
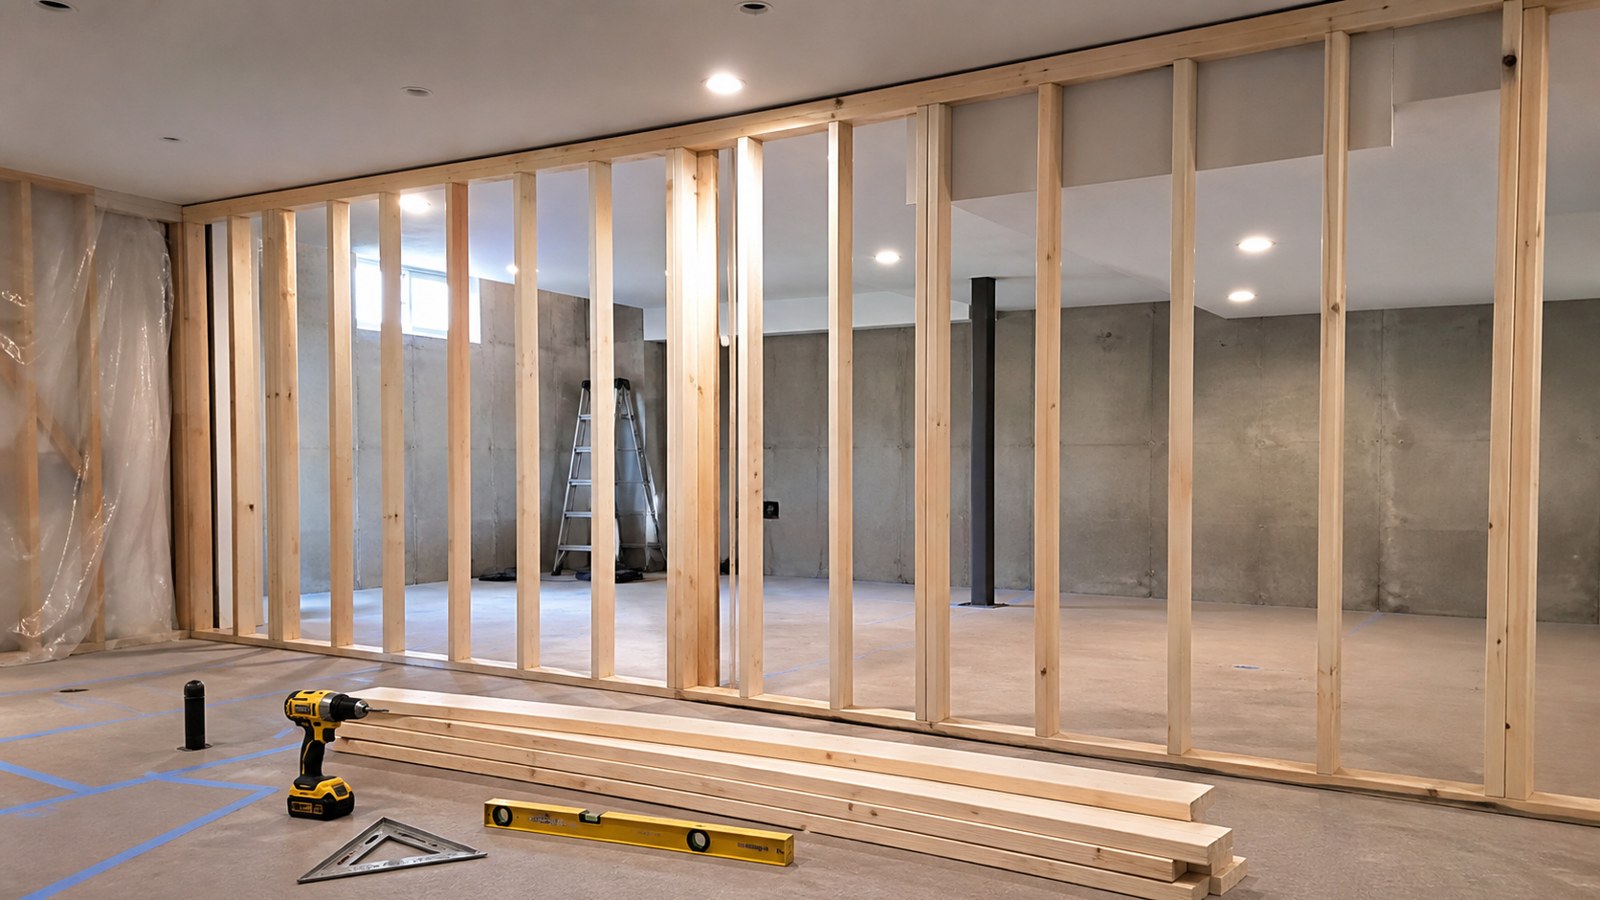
A stud wall is more than a row of boards between a floor and ceiling. The wall has to land in the right place, fasten to solid structure, leave room for doors or utilities, and give drywall, trim, cabinets, and fixtures a flat surface to finish against. Most framing problems start before the first stud is nailed, when the layout is rushed or the wall type is misunderstood.
This walkthrough focuses on a basic non-load-bearing partition. If the wall carries weight from above, supports a beam, changes stairs, or affects structural openings, the project needs approved plans and qualified guidance. For a simple interior wall, careful measuring, clean plate layout, and steady checking make the difference between a wall that merely stands and one that finishes cleanly.
A: Confirm the wall is non-load-bearing and that the layout works with doors, utilities, and finishes.
A: Paired plates keep stud spacing, openings, and backing marks aligned from top to bottom.
A: Build flat when there is room to raise it safely; stick-frame tight spaces or low ceilings.
A: Use accurate layout lines, straight lumber, braces, plumb checks, and secure plate fastening.
A: Floors and ceilings vary, so repeated cuts can leave gaps or force the wall out of alignment.
A: Confirm rough opening size, plumb sides, header requirements, and enough backing for trim.
A: Use fasteners suited to wood framing, concrete, subfloor, slab, or local requirements.
A: Add blocking before drywall wherever cabinets, rails, shelves, TVs, trim, or drywall edges need support.
A: Check plumb, straight, square, anchors, top fastening, openings, backing, utilities, and protection plates.
A: Call for bearing questions, structural openings, concrete fastening uncertainty, utility conflicts, or code requirements.
Confirm the Wall Is Non-Load-Bearing
Before buying lumber or snapping a line, confirm what the wall is meant to do. A non-load-bearing wall divides space and supports finishes. A load-bearing wall transfers weight from floors, ceilings, roof framing, beams, or stacked walls above. Those two walls can look similar after drywall, but they are designed and approved differently.
Look for clues in the attic, basement, crawlspace, and available plans. Joist direction, beams, posts, foundation supports, and walls stacked above or below can all affect the answer. If the new wall replaces an existing wall, changes an opening, or sits under framing that may carry load, pause and get the structure checked before treating it like a simple partition.
Also consider local requirements. Even a non-load-bearing wall may affect egress, electrical spacing, smoke alarms, fire blocking, HVAC airflow, or plumbing access. A quick permit or code check is much easier than rebuilding a finished wall because one requirement was missed.
Plan the Finished Face
Framing layout should be based on the finished room, not just where a board can fit. Decide which face of the wall matters most. It may need to align with an existing hallway, cabinet edge, doorway, stair opening, tub, vanity, closet system, or flooring transition. Marking only a vague centerline can create surprises when drywall thickness and trim are added.
Think through both sides of the wall. One side may need a clean furniture wall while the other carries shelves, plumbing, or electrical devices. If the wall contains a door, confirm the swing direction, clearances, casing width, flooring height, and whether the door should line up with another opening.
Write down the finished wall thickness. Standard framing, drywall on both sides, tile backer, paneling, sound board, or special finish layers can change the final location. That thickness matters where the new wall meets existing trim, tile, cabinets, or flooring.
Mark the Floor Line Accurately
Start the physical layout on the floor. Use a tape measure, chalk line, straightedge, or laser to mark the face of the bottom plate. Measure from more than one reference point because existing rooms are rarely perfect. A wall measured from one crooked surface may look straight on paper but feel wrong in the room.
If the wall is supposed to be square to another wall, check with the 3-4-5 method, a large framing square, or diagonal measurements. If it is supposed to follow an existing wall, decide whether matching the old wall or correcting it will create the better finished result. Sometimes a technically square wall looks odd because the rest of the room is not square.
Mark door openings, intersections, corners, and any special backing locations on the floor before lumber covers the line. These early marks keep the wall connected to the actual room instead of becoming a loose assembly that has to be adjusted later.
Transfer the Layout to the Ceiling
The top plate must land directly above the bottom plate. Transfer the line with a plumb bob, laser, long level, or careful measurements from reliable references. Do not trust your eye. Ceilings, floors, and old walls may be out of level, out of plumb, or bowed enough to fool a quick glance.
After the ceiling line is marked, locate framing above it. A top plate fastened only to drywall will not make a stiff wall. If the line runs below joists, fastening is straightforward. If it runs between joists, add blocking where needed or plan a fastening method that ties the wall into solid structure.
Ceiling layout is also the time to look for recessed lights, ducts, pipes, wiring, attic access, sprinkler lines, or anything else that could conflict with the wall. A stud wall is easier to move by half an inch on layout day than after it is assembled and wired.
Choose and Sort the Lumber
Use lumber that matches the wall design, height, and finish expectations. For many interior partitions, 2×4 studs are common, but wall thickness may change for plumbing, sound control, tall walls, or special details. Check the project requirements before assuming one size fits every situation.
Sort each board before cutting. Save the straightest pieces for plates, door openings, outside corners, and long visible runs. Set aside badly twisted, split, crowned, or damaged pieces. Construction lumber is not furniture stock, but a wall built from the worst boards in the pile will telegraph problems through drywall and trim.
Look at the crown direction of the studs. Keeping crowns oriented consistently helps the wall plane behave predictably. A few minutes of sorting feels slow at the beginning, but it saves sanding, shimming, and frustration after the wall is closed.
Cut and Pair the Plates
The top and bottom plates define the wall length and stud layout. Cut them to match the floor and ceiling marks, then place them side by side so layout marks can be transferred accurately. If the room is uneven, label which plate is top, which is bottom, and which end faces the reference wall.
Mark studs with a square across both plates at the same time. Mark the stud edge, not just the center, so each stud has a clear side to land on. Write an X on the side where the stud belongs. That little habit prevents the layout from drifting as the wall is assembled.
If the wall intersects another wall, add marks for backing. If it ends at an existing wall, decide how the new framing will fasten and how the drywall corners will be supported. A neat plate layout includes the ordinary studs and the less glamorous pieces that make finishing possible.
Lay Out Stud Spacing With Drywall in Mind
Many interior partitions use regular stud spacing such as 16 inches on center, but the exact spacing depends on wall height, material, code, finish, and design. Start from the correct end of the wall so drywall panel edges land where expected. If you start from the wrong end, the layout may be technically consistent but inconvenient for sheathing or drywall.
Openings, corners, and intersections interrupt the pattern. Door framing, extra backing, deadwood for drywall, and blocking for accessories may require additional pieces. Do not remove useful backing just to preserve a perfect rhythm. The purpose of layout is a buildable wall, not a pretty set of pencil marks.
Mark any known electrical boxes, plumbing paths, grab bars, cabinets, towel bars, shelving, handrails, or wall-mounted fixtures. Adding backing now is simple. Trying to anchor a heavy fixture after drywall because no blocking was installed is the kind of mistake that makes a finished wall feel unfinished.
Measure Stud Height in Several Places
Measure from floor to ceiling along the wall line, not just at one end. Floors can dip, crowns can rise, and old ceilings can sag. If every stud is cut from one measurement, some may fit well while others leave gaps or force the plate out of line.
If the wall will be built flat on the floor and raised, account for the room needed to tilt it into place. In a tight basement or a room with a low ceiling, a full-height wall may not rotate up without binding. In that case, stick-framing the wall in place can be cleaner than trimming every stud short and shimming afterward.
Keep the fit snug but practical. A wall forced into place can damage ceilings, lift flooring, or bow plates. A wall cut too short may need shims and careful fastening to avoid movement. The right method depends on the room, not just habit.
Frame Door Openings With Extra Care
Door openings deserve more attention than plain studs because small framing errors show up every time the door moves. Confirm the actual door size, jamb style, rough opening requirement, flooring thickness, and swing direction before cutting king studs, jack studs, or headers.
A prehung interior door usually needs a rough opening wider and taller than the unit so it can be shimmed plumb, level, and square. The opening should be checked at the top, middle, and bottom. A doorway that pinches near the floor or leans at one side can turn door installation into a long fight.
Keep the header level and the jack studs tight beneath it where the design calls for them. Even in a non-load-bearing wall, the opening needs stable framing so casing joints, latch alignment, and drywall corners stay clean.
Assemble Flat When the Room Allows
For a simple wall with enough floor space, assembling flat is efficient. Lay the plates parallel, place each stud on its mark, and fasten through the plates into the stud ends. Check that the studs remain on the correct side of the layout marks as fastening begins.
Fasten one end, verify the stud is seated and aligned, then fasten the other end. A stud that shifts during nailing or screwing can create a wave in the finished wall. Keep the crowns consistent and keep the plate edges flush unless the design calls for an intentional offset.
Before raising the wall, compare the assembled frame to the room marks. Confirm the door opening, backing, blocking, and plate orientation. Catching a reversed plate while the frame is flat is mildly annoying. Catching it after the wall is anchored is much worse.
Stick-Frame Tight Spaces
When the wall cannot be raised safely, install the plates first and add studs one at a time. Fasten the bottom plate to the floor line and the top plate to ceiling framing, then cut each stud to fit its actual location. This approach works well in low basements, closets, mechanical rooms, and areas where a full wall would hit the ceiling during lifting.
Stick-framing requires patience because each stud must be checked for plumb and alignment. Toe-screw or toenail carefully so the stud does not move off the mark. Use a level and straightedge as you go rather than waiting until the wall is complete.
This method also helps when floors and ceilings vary. Instead of forcing identical studs into a changing space, each piece can be cut for its spot. The tradeoff is more individual measuring and more chances to drift if marks are not clear.
Raise and Position the Wall Safely
If the wall was built flat, clear the floor before lifting. Remove cords, offcuts, tools, and anything that can trip someone. Long walls are awkward and can twist while being raised, so get help when the wall is too heavy or too long to control.
Lift slowly and keep fingers away from pinch points between the plates and floor or ceiling. Set the wall on the layout line, then check both ends before fastening. A wall can land close to the mark but still be slightly rotated, especially if the floor is dusty or the wall is long.
Use temporary braces if the wall cannot be anchored immediately. Do not leave a loose wall standing where someone might bump it. Framing that feels stable for a moment can move quickly if it is not tied in.
Anchor the Bottom Plate Correctly
The bottom plate fastening method depends on the floor. On wood framing, fasten into joists, subfloor, or blocking as appropriate. On concrete, use approved concrete anchors, masonry screws, powder-actuated fasteners, or other suitable hardware for the slab and local requirements.
Use treated lumber where required against concrete. Regular untreated lumber in contact with concrete can absorb moisture and decay. Add a sill gasket or barrier when appropriate to reduce moisture transfer and air movement.
Keep fasteners clear of pipes, radiant heat tubing, wiring, and unknown slab contents. If the floor may contain utilities, investigate before drilling or shooting fasteners. One careless anchor can turn a framing job into a plumbing or electrical repair.
Fasten the Top Plate to Structure
The top plate should tie into solid framing above. If it runs perpendicular to joists, fasten into each joist it crosses. If it runs parallel between joists, install blocking above or use another approved method that gives the wall real support.
Do not depend on drywall alone. Drywall can hide movement briefly, but it is not a structural fastening surface for a new wall. A top plate that is not secured well can rattle, bow, crack drywall seams, or make doors feel unstable.
After fastening, sight down the wall and check plumb at several studs. Adjust before adding more blocking, electrical boxes, or drywall. The best time to correct a wall is while the framing is still open and accessible.
Add Blocking Where the Room Needs It
Blocking is easy to overlook because it disappears behind drywall, but it makes the finished room more useful. Add solid backing for cabinets, shelves, grab bars, handrails, towel bars, closet rods, wall-mounted TVs, heavy mirrors, baby gates, and future accessories.
Mark blocking locations on the floor, take photos, and note measurements before the wall is covered. Future you will appreciate knowing exactly where the backing sits. A photo with a tape measure in the frame is more useful than a vague memory.
Also include drywall backing at corners and intersections. Every drywall edge needs support. Missing backing can create loose edges, cracked seams, or awkward repair work after the wall is otherwise ready for finishing.
Coordinate Electrical, Plumbing, and HVAC
Before drywall, decide what the wall must carry. Electrical boxes, cable routes, low-voltage wiring, plumbing vents, supply lines, ducts, returns, and thermostats all need space. A wall framed without thinking about utilities may require notching, drilling, or rebuilding immediately afterward.
Follow rules for bored holes, notches, nail plates, box spacing, and fixture clearances. Protect wiring and pipes where fasteners could reach them. If plumbing needs to pass through the wall, confirm stud size, pipe slope, insulation, and access before the framing pattern is locked in.
Sound control may also matter. Bedrooms, bathrooms, offices, laundry rooms, and media rooms can benefit from insulation, sealant, resilient details, or thoughtful utility placement. Even a basic wall can perform better when those choices are made while the cavities are open.
Check Plumb, Straight, and Square
Use a level on several studs, not just one. Sight down the plates. Check the face of the wall with a long straightedge or string line. Measure door openings again. Confirm that corners are square enough for the finishes that will meet there.
Small framing waves become visible under drywall, baseboard, casing, cabinets, and light from windows. If one stud is proud, bowed, or twisted, plane it, shim nearby framing, or replace it before the wall is covered. Drywall compound can hide minor imperfections, but it should not be asked to fix bad framing.
Also check that the wall is anchored and blocked before calling it ready. A wall can look straight and still be weak if the top plate misses structure or the bottom plate lacks proper fastening.
Review the Stud Wall Before It Is Covered
The final framing inspection is your last easy chance to fix the wall. Confirm stud spacing, backing, door rough openings, fastening, utility protection, fire blocking, and access needs. Look for split studs, missed fasteners, protruding nails, and sharp edges that could damage wires or pipes.
Take photos of every wall face before insulation or drywall. Include wide shots and close-ups of blocking, wiring, plumbing, and valve locations. Those photos become a map for future repairs, shelves, remodels, and troubleshooting.
Sweep the area and remove loose debris from the base of the wall. Clean framing makes it easier to spot problems, seal gaps, and install drywall flat. It also keeps small offcuts from being trapped where they can rattle or interfere with finishes.
Common Stud Wall Mistakes
The most common mistake is treating layout as approximate. If the bottom plate is wrong, every stud above it inherits the error. Another common mistake is forgetting that drywall, trim, doors, cabinets, and flooring all need predictable framing behind them.
Builders also run into trouble when they ignore ceiling framing, skip blocking, use poor lumber in visible areas, cut all studs from one measurement, or frame a door opening without checking the actual unit. Each mistake may look small during framing but expensive during finishing.
Rushing the last check is just as risky. Before drywall, ask whether the wall is straight, plumb, well anchored, properly backed, and ready for utilities. If the answer is uncertain, fix the uncertainty while the framing is still visible.
Final Stud Wall Review
Building a stud wall well comes down to sequence and verification. Confirm the wall type, mark the finished location, transfer the layout to the ceiling, sort the lumber, mark paired plates, frame openings carefully, and tie the wall to solid structure. None of those steps is flashy, but each one protects the finished result.
A clean partition should feel boring by the time drywall starts. The studs should be where they belong, the door opening should be square, the wall should be plumb, and the hidden backing should already be in place. That quiet accuracy is what makes the finished wall look intentional instead of patched together.


