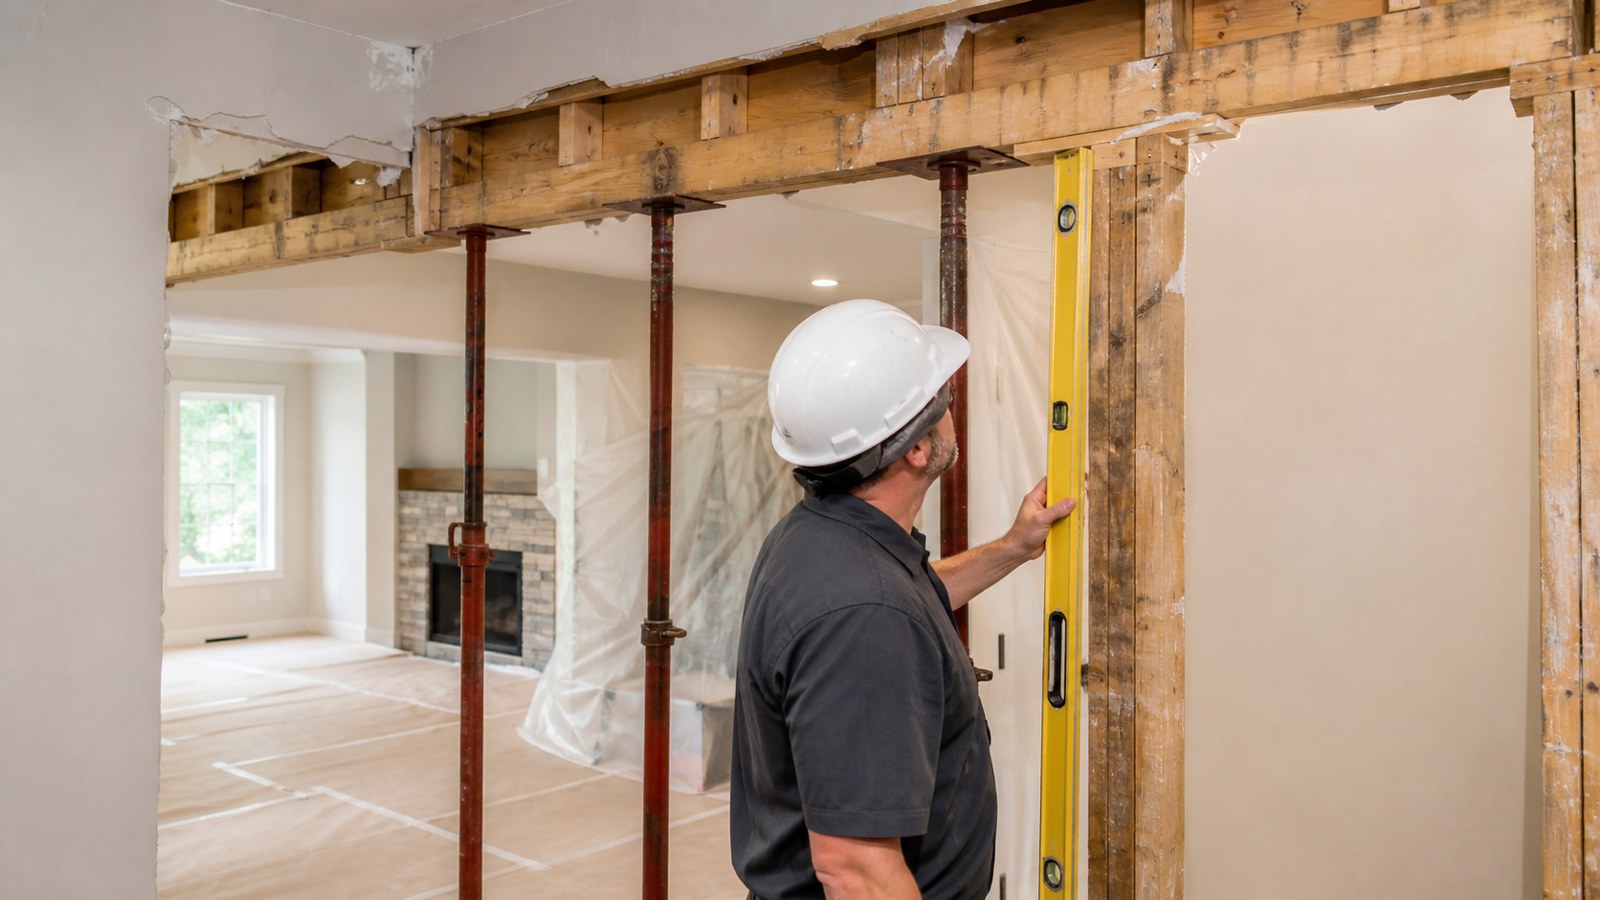
A load-bearing wall is part of the path that carries weight from the roof, floors, or walls above down to the foundation. Removing or changing that wall is not just demolition. It is a structural change that needs a replacement path for the load, temporary support while the work happens, and enough planning to keep the house stable after the room is opened up.
The safest first move is to slow down and identify what the wall is doing. Some walls only divide rooms, while others support joists, beams, roofs, or stacked framing. The difference is not always obvious from the drywall side, so the inspection has to include the spaces above, below, and around the wall before any studs are cut.
A: Trace joists, stacked walls, beams, posts, foundations, and roof or floor loads above and below.
A: Only with proper design, permits, temporary support, and the skill to complete the work safely.
A: A designed beam, posts, connectors, bearing points, and sometimes new footings replace the removed support.
A: It carries the load while the old wall is opened and the new structure is installed.
A: Check load path, utilities, permits, hidden damage, access, finishes, and support locations.
A: Plan safe reroutes before widening the opening or cutting framing.
A: Yes. Structural changes often require engineering, permits, and inspection before the work is covered.
A: Stop for sagging, cracking, shifting, unknown loads, damaged framing, sparks, leaks, or unclear support.
A: Photos and paperwork prove how the load was supported before the structure was hidden.
A: Call for any bearing-wall removal, beam sizing, footing questions, utility conflicts, or unclear field conditions.
Start With the Load Path
Every load-bearing wall has a job: it transfers weight to something below it. That load may come from ceiling joists, floor joists, roof framing, another wall above, or a beam hidden inside the ceiling. The wall itself is only one part of a larger path that eventually needs to reach the foundation.
When evaluating a wall, ask where the weight comes from and where it goes next. If the answer is not clear, the wall should be treated as potentially bearing until a qualified person confirms otherwise. Guessing wrong can lead to sagging floors, cracked finishes, sticking doors, and structural movement.
Look Above the Wall
The framing above the wall often gives the first useful clues. In an attic, basement ceiling, crawlspace, or exposed area, look for joists that land on the wall, beams that terminate above it, rafters that transfer roof load nearby, or another wall stacked directly above.
Joist direction matters, but it is not the only clue. A wall running perpendicular to joists is more suspicious, but a parallel wall can still carry load if a beam, roof line, or point load lands on it. Follow the actual framing, not just the easiest rule of thumb.
Look Below the Wall
A bearing wall needs support below. Check whether the wall sits over a basement beam, foundation wall, crawlspace pier, post, girder, or another wall. If the load above is strong but the support below is weak or missing, removing the wall is not the only concern; the existing structure may already need review.
For open-concept projects, posts added to replace a wall must land on something capable of carrying the concentrated load. A post sitting on ordinary subfloor between joists may not be acceptable. Footings, beams, and load paths below the floor matter as much as the visible beam above the opening.
Check for Stacked Walls
Walls that line up from one floor to the next often indicate load transfer. A first-floor wall below a second-floor partition, attic knee wall, or roof support deserves careful attention. Even if the upper wall is short or partly hidden, it may still be moving load downward.
Stacked walls are especially common in older homes where framing was planned around simple vertical support. If several floors share the same wall line, do not assume the wall is decorative. Trace the stack before planning an opening.
Watch for Beam and Header Clues
Existing beams, boxed-in soffits, dropped ceilings, wide trim, thick wall sections, or old patched openings can all suggest that structure is already being managed in that area. A previous remodel may have hidden a beam or changed the original load path.
Large openings near the wall are also clues. If nearby doors, cased openings, or pass-throughs have oversized headers or posts, the wall may be part of a structural zone. Look for signs before assuming the wall can be removed cleanly.
Identify Utilities Before Demolition
Load-bearing walls often share space with wiring, plumbing, HVAC ducts, gas lines, vents, and low-voltage cable. These systems do not determine whether the wall carries load, but they affect the cost, schedule, and risk of any removal project.
Use careful inspection, not aggressive demolition, to locate utilities. Turn off power where needed, open small exploratory areas if appropriate, and stop if pipes, vents, or wiring appear. Rerouting utilities should be planned before structural work begins.
Understand What Replaces the Wall
Removing a bearing wall usually means installing a beam and supporting that beam with posts or other approved framing. The beam may sit below the ceiling, fit flush into the ceiling, or integrate with other framing. Each option changes cost, difficulty, and finish work.
The replacement is not just the beam. Bearing length, post size, connectors, temporary support, joist attachment, and support below the posts all matter. A beam that is strong enough on paper can still fail as a system if it does not bear correctly.
Temporary Support Is Part of the Job
Before a bearing wall is opened, the loads it carries may need temporary support. Temporary walls, posts, or shoring hold the structure while the old wall is removed and the new beam is installed. Their location and construction must match the load and the work sequence.
Do not remove studs one at a time and hope the house tolerates the change. The safest sequence is planned before demolition starts. Temporary support should remain in place until the permanent beam, posts, connectors, and bearing points are installed correctly.
Place Temporary Walls Deliberately
A temporary wall only helps if it is built where it can actually catch the load. It may need to sit on both sides of the wall being removed, below joists that are being supported, and over framing or slab that can handle the short-term weight. A temporary wall set in the wrong place can give a false sense of safety.
The temporary support also has to leave enough room to work. Beam installation, post placement, utility rerouting, and inspection access all need clearance. This is why the temporary plan should be drawn into the sequence before demolition day, not improvised after the ceiling is open.
Plan for Posts and Footings
Posts concentrate load. That load has to continue down to framing, beams, piers, or footings that can handle it. A common mistake is focusing on the beam above the opening while ignoring where the beam ends land.
If posts land over a basement, crawlspace, slab, or framed floor, the support below should be checked. Sometimes extra framing, a new footing, or a post below is needed. This is one reason engineers are often involved in wall-removal projects.
Understand Beam Placement Options
A beam can sit below the ceiling line or be recessed flush into the ceiling framing. A dropped beam is usually easier to install because the joists can bear on or connect to it without as much ceiling surgery. The tradeoff is that the beam remains visible and may affect lighting, cabinets, or sightlines.
A flush beam can look cleaner, but it is usually more involved. Joists may need to be cut, hung from the new beam, or temporarily supported in stages. That work is not a cosmetic upgrade; it changes how loads connect to the beam. The installation method should be part of the plan before demolition begins.
Account for Floor and Ceiling Finishes
Wall removal often disturbs more finish work than expected. Flooring may stop at the old wall line. Ceiling texture may not match after the beam or temporary support work. Baseboards, crown molding, paint sheen, and lighting may all need adjustment once the wall is gone.
Planning these finish conditions does not replace structural planning, but it keeps the project realistic. A wall can be removed safely and still leave an awkward scar if flooring, trim, and ceiling repairs are not included in the scope.
Get the Engineering and Permit Trail Right
Many bearing-wall removals need drawings, beam sizing, connector notes, inspections, and permit approval. Those documents are not paperwork for its own sake. They tell the installer what beam to use, how much bearing is required, what fasteners belong in each connector, and what support is needed below.
Keep the latest approved plan on site while the work happens. If field conditions do not match the plan, stop and get the change reviewed. Substituting a different beam, moving a post, or changing a connector can alter the structural design.
Watch for Hidden Damage After Opening the Wall
Once drywall or plaster is removed, the wall may reveal water damage, insect damage, cut studs, undersized headers, notched framing, old fire damage, or previous repairs. Those discoveries can change the removal plan because the existing structure may not be as strong as expected.
Do not cover hidden damage with the new beam work and call it solved. Photograph the condition, pause demolition, and decide whether the repair needs engineering, pest treatment, moisture correction, or additional framing. A safe opening depends on the condition of the surrounding structure too.
Open Small Areas Before Committing
Exploratory openings can reveal joist direction, pipes, wires, blocking, old headers, or unexpected framing. A few controlled inspection holes are better than full demolition based on assumptions. Patchable openings can save money if they reveal that the project is more complicated than expected.
Open inspection areas carefully and safely. Turn off power where appropriate, avoid cutting deeply with unknown utilities behind the wall, and document what is found. Those photos and notes can help an engineer, contractor, or inspector understand the existing condition.
Permits and Engineering Matter
Many load-bearing wall changes require permits, drawings, and inspections. That process can feel slow, but it protects the house and creates documentation for future buyers, insurance questions, and later remodels.
An engineer or qualified designer can size the beam, specify posts, identify bearing requirements, and note connector details. The cost of that review is small compared with correcting a sagging ceiling or opening a finished project because an inspector rejects hidden structural work.
Sequence Demolition Carefully
Demolition should expose the wall without damaging the framing that still needs to work. Remove finishes carefully enough to see studs, plates, utilities, and any existing headers. Keep the area clean so cracks, movement, or unexpected conditions are easier to notice.
If the wall contains old plaster, tile, multiple drywall layers, or hidden patches, expect extra time. Do not cut blindly into a wall that may contain wiring, pipes, or gas lines. Controlled demolition gives better information and fewer surprises.
Watch for Warning Signs
Cracks that widen, doors that suddenly stick, ceiling movement, sagging, popping sounds, or gaps opening near trim are reasons to stop and reassess. These signs may appear during demolition, temporary support, or beam installation if something is not carrying properly.
Also pay attention to older signs: patched ceiling cracks, sloped floors, doors shaved at the top, or trim gaps near the wall. Those clues can mean the structure has moved before, and the wall removal needs more than a simple beam plan.
Think About the Finished Opening
Structural planning should happen with the finished room in mind. A dropped beam may be easier and cheaper but will remain visible. A flush beam may look cleaner but often requires more ceiling work, joist modification, and temporary support.
Post locations also affect the room. A post at the end of an island, hallway, or seating area may change how the space works. Decide whether the finished opening, trim, lighting, flooring transitions, and ceiling repair fit the plan before the wall is opened.
Do Not Forget Fire, Sound, and Utilities
Removing a wall can interrupt fireblocking, sound separation, duct routes, electrical circuits, and plumbing paths. The replacement work should restore required protection and access, not just create a wider room.
If the wall separates a garage, utility space, stair, multifamily area, or mechanical zone, requirements may be stricter. Treat those conditions as part of the design rather than finish details to solve later.
Inspect Connections Before Covering
The most important parts of a bearing-wall project are often hidden after drywall: beam bearing, post connections, joist hangers, straps, fasteners, blocking, and support below the floor. Before cover-up, compare the installed work with the approved plan or engineering notes.
Check that specified connectors are actually installed, that fastener holes are filled as required, and that posts bear fully where they are supposed to. Small missing hardware can matter because engineered connections rely on the whole assembly, not just the big lumber.
Plan the Room While Support Is Visible
Once the structure is exposed, it is also the best time to think about lighting, switches, HVAC registers, ceiling patches, and trim returns. Open-concept work often changes how a room is used, where furniture lands, and where light is needed.
Coordinate those decisions before everything is closed. It is frustrating to finish a beautiful opening and then discover the light switch is stranded behind furniture, the ceiling patch crosses a fixture, or a supply register no longer serves the new layout well.
Document the Structural Work
Keep copies of permits, engineering notes, beam specifications, inspection approvals, and photos taken before the ceiling or wall is closed. Photograph the beam, posts, connectors, bearing points, and any support added below.
That documentation helps future repairs and resale. It also prevents the next homeowner or contractor from guessing what is hidden above the finished opening.
Final Safety Review
Before the room is finished, confirm that the beam is installed as specified, posts are properly supported, connectors are complete, utilities are safely rerouted, inspections are handled, and temporary supports are removed only when the permanent structure is carrying the load.
Walk the space one more time with the approved notes in hand. The finished opening should match the structural plan, not just the design sketch.
A load-bearing wall project succeeds when the open room still has a clear, continuous load path. The goal is not simply to remove studs. The goal is to replace their structural job with a system that can be inspected, documented, and trusted after the drywall and trim are back in place.