
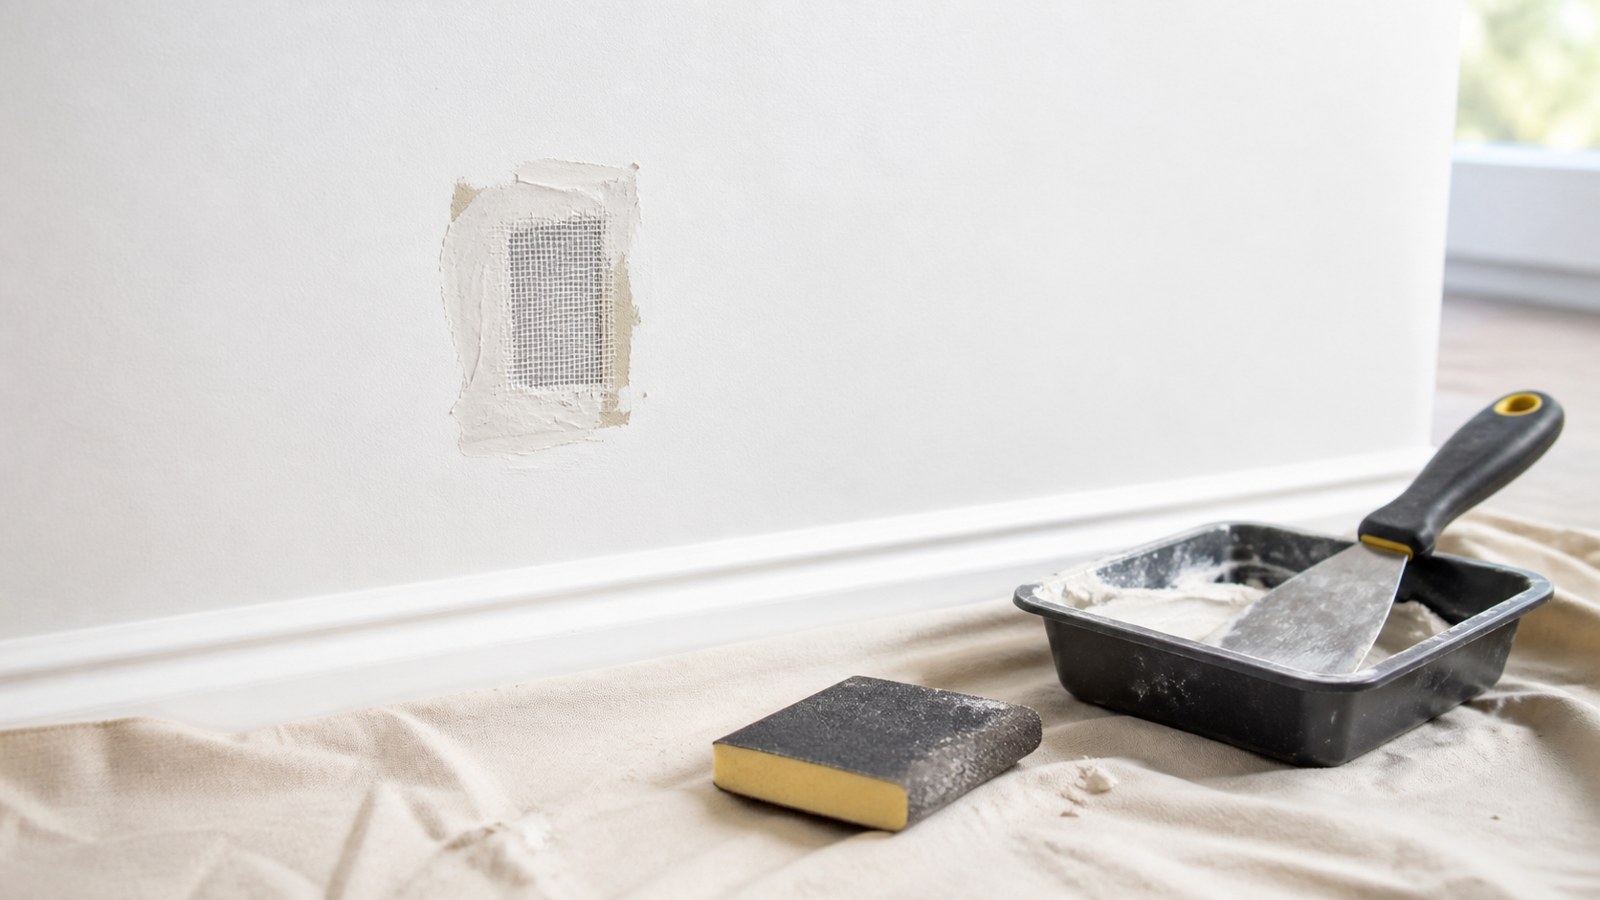
A small drywall hole can be patched quickly, but the best results come from working neatly instead of rushing. The ten-minute part is the hands-on repair: cleaning the edge, choosing the right patch, applying a thin coat, and leaving the surface shaped well enough that sanding and paint blending are easier later.
Dry time is separate. Spackle, joint compound, primer, texture, and paint still need time before the wall is truly finished. When that expectation is clear, a quick drywall repair can stay simple without turning into a raised, shiny patch that catches light forever.
A: Small holes can be started quickly, but drying, sanding, priming, and paint take longer.
A: Trim loose material and stabilize torn paper before adding compound.
A: No. Nail and screw holes usually need only a small filled dimple and a light sand.
A: Use mesh or a wider repair when the paper face is crushed or the gypsum crumbles.
A: Keep it thin enough to dry, shrink, and sand without creating a raised mound.
A: Feathering spreads the transition so the repair does not read as a bump.
A: Sand only after the compound is firm and dry enough not to smear or tear.
A: Yes, texture differences can be as visible as color differences after paint.
A: Primer evens porosity so the repair does not flash through the finish coat.
A: Slow down for large holes, wet drywall, recurring cracks, corner damage, or loose backing.
Identify the Hole Before You Start
Drywall holes are not all repaired the same way. A nail hole, screw hole, plastic anchor hole, doorknob dent, torn paper spot, and fist-sized break each need a different approach. The fastest repair is the one that matches the damage instead of forcing one product to do every job.
Look beyond the open hole. Crushed gypsum, loose paint, raised paper, cracks, and soft edges may make the damaged area larger than it first appears. If the surrounding wall is unstable, filling only the center will leave a weak repair that shows later.
Gather Everything First
Before opening compound, set out the tools. For most small repairs, you need a utility knife, putty knife, sanding sponge, clean rag, spackle or joint compound, primer, paint, and possibly a self-adhesive mesh patch. A wider taping knife helps feather larger patch edges.
Having everything ready keeps wet compound from drying on the knife while you hunt for sandpaper. It also lets you work more calmly. Drywall patching is usually messy when the repair starts before the setup is finished.
Choose the smallest tool that still feathers the repair well. A tiny knife is fine for nail holes. A mesh patch needs a wider knife so the compound can taper gradually into the wall.
Clean the Damage
Loose paper and crumbly gypsum keep a patch from sitting flat. Trim ragged edges with a sharp utility knife. Remove loose material, but do not carve the opening larger than necessary. A stable small patch is easier to hide than an oversized repair.
If paper is raised, slice it cleanly rather than burying the flap in compound. If dust is sitting in the hole, wipe or vacuum it out. Compound bonds better to a clean surface than to powdery drywall debris.
For dents, press around the area gently. If the drywall face is crushed but not open, you may need to scrape loose paint or paper before filling. The wall should feel stable before patch material goes on.
Seal Torn Paper When Needed
Exposed brown drywall paper can blister when wet compound touches it. If the paper is fuzzy, torn, or absorbent, seal it before applying compound. This adds waiting time, but it prevents a frustrating bubble from appearing in the patch.
A shellac-based primer or drywall sealer is often used for torn paper. The goal is to lock down the surface so the next coat stays flat. Skipping this step can turn a simple hole into a repair that has to be cut open and redone.
If the paper damage is tiny and the wall is not in a high-visibility area, you may be able to proceed carefully. On smooth walls or strong light, sealing torn paper is usually worth the pause.
Fix Nail and Screw Holes
Tiny holes are the fastest repairs. Press a small amount of spackle into the opening, then scrape the surface nearly flush. Avoid leaving a mound. Extra filler does not make the repair stronger; it only makes drying and sanding slower.
If the filler shrinks slightly after drying, add a second thin pass. Two thin applications usually look better than one thick blob. Use your fingertips to feel the repair after it dries because touch often catches ridges that the eye misses.
For popped drywall screws, do not simply cover the head if the panel is loose. Drive a new drywall screw into the stud nearby, set the popped fastener properly or remove it, then patch the surface. Covering movement does not solve movement.
Repair Anchor Holes
Plastic wall anchors can leave ragged openings. If the anchor is loose, pull it out cleanly. If it resists, score around the edge and remove it carefully so the surrounding paper does not tear more than necessary.
Deep anchor holes may need more than one pass. A thick plug of filler can shrink, crack, or remain soft in the center. Fill the back of the hole, scrape the face flat, and return for a final skim if the repair sinks.
If the anchor tore a wide area, treat it like a small damaged patch rather than a pinhole. The goal is a flat wall face, not just a filled cavity.
Use Mesh Patches for Small Breaks
Self-adhesive mesh patches work well for holes that are too large for filler alone but not large enough to justify cutting in a drywall piece. The wall surface must be clean and flat so the patch sticks fully at the edges.
Center the patch over the opening and press the corners down. Cover it with a thin coat of compound that extends several inches beyond the patch. The edges should feather into the wall gradually. If the patch looks like a square sticker under the compound, the repair area is too small.
Mesh patches often need more than one coat. The first coat bonds and covers the mesh. Later coats hide the patch outline and flatten the wall. Trying to bury everything in one heavy coat usually creates a hump.
Add Backing for Larger Holes
If the damaged area flexes, a surface patch is not enough. Larger holes need backing or a fitted drywall insert. Compound cannot bridge a loose opening permanently, and unsupported patches tend to crack or dent.
A small wood backer can be slipped behind the drywall and screwed through the surrounding wall, then a drywall piece can be attached to the backer. This takes longer than a quick mesh patch, but the repair has real support behind it.
When the hole is near wiring, plumbing, or unknown wall contents, work carefully. Do not drive screws blindly deep into a wall cavity. If the damage exposes anything questionable, slow down and inspect before closing it.
Keep the First Coat Thin
Thin compound dries better, sands cleaner, and shrinks less. Spread only enough material to fill the damage and begin feathering the surface. Let the knife ride past the repair so the edges taper into the existing wall.
A thick center creates a raised spot that catches light. It also tempts aggressive sanding, which can expose mesh, scuff surrounding paint, or dish out the patch. Thin coats take more patience but less rescue work.
Wipe the knife often. Dried crumbs on the blade scratch the surface and leave tracks. One clean pass is better than six nervous passes over compound that is already starting to drag.
Feather Wider Than the Hole
The visible patch edge is usually what gives the repair away. A tiny mound directly over the hole creates a sharp transition where light catches the ridge. A wider feather spreads the repair gently into the wall.
For small holes, feather just beyond the damage. For mesh patches, feather several inches beyond the patch edges. Smooth walls need more careful feathering than heavy textured walls because every ridge is easier to see.
Do not confuse wider with thicker. The repair should spread out thinly, not grow into a broad lump. The putty knife should remove excess material while shaping the transition.
Let the Patch Set Before Sanding
Fast-setting products can shorten the wait, but the surface still has to set before sanding. If compound feels cool, dark, soft, or tacky, it is not ready. Sanding too soon tears the patch and loads the abrasive.
Premixed spackle is easy for beginners but may need more drying time. Setting-type compound is faster but less forgiving. Mix only what you can apply calmly before it begins to harden.
Painting too soon is just as risky. Moisture trapped under primer or paint can create flashing, dull spots, or a swollen repair. The active repair may be quick; the finish still needs time.
Sand Lightly
Use a fine sanding sponge and light pressure. Start at the feathered edges, then blend the center only as needed. Heavy sanding can expose mesh, damage the paint around the repair, or create a depression.
After sanding, wipe or vacuum the dust. Primer and paint do not bond well to powder. Dust left on the wall can also make touch-up paint look rough or dull.
Close your eyes and run your fingertips near the patch. If you feel a ridge, you will probably see it after paint. If you feel a hollow, another thin coat may be better than sanding more.
Match Texture Before Paint
Texture is often harder to hide than the hole. Orange peel, knockdown, brush texture, roller stipple, and smooth walls all need different handling. A flat patch on a textured wall can stand out even if the compound is perfectly smooth.
Practice texture on scrap cardboard or a hidden area when possible. Spray texture should be built gradually. Knockdown texture needs the right wait before flattening. Roller texture may require matching the nap and pressure used on the wall.
Do not texture over a lumpy patch. Texture hides small differences, not poor shaping. The base repair should be flat before texture is added.
Prime the Repair
Raw compound absorbs paint differently than the surrounding wall. Primer evens out the surface so the topcoat does not flash dull or shiny. Even small patches can show if paint is applied directly over bare compound.
Spot-prime slightly beyond the repair and let it dry fully. If the primer reveals a ridge or pinhole, fix that before painting. Primer is a useful checkpoint because it makes flaws easier to see.
Use a primer compatible with the repair and the wall paint. Torn paper, stain, or high-gloss existing paint may require more careful product choice than a simple nail hole.
Blend the Paint Carefully
Use leftover paint from the original wall if available, and confirm the sheen. Flat, eggshell, satin, and semi-gloss reflect light differently. The right color in the wrong sheen can still look like a patch.
Feather paint outward from the repair rather than leaving a hard edge. On older walls, touch-up paint may show because the existing paint has faded or collected wear. In strong light, painting the entire wall to a corner may look cleaner than chasing a perfect spot repair.
If the wall has roller texture, use a small roller instead of brushing the patch. Matching the application method often matters as much as matching the paint.
Work Carefully Near Trim and Corners
Holes near baseboards, casing, corners, and ceilings are harder to feather because there is less room for the repair to taper. Use painter’s tape where needed, but remove it before compound builds a hard ridge.
A narrow knife may be needed near trim, followed by a wider knife where space allows. Keep compound off finished woodwork and wipe mistakes before they dry. Repairs near trim often look messy when the edge is ignored.
If the hole was caused by a doorknob, add a doorstop after the patch. Otherwise the same damage will return as soon as the door swings open again.
Know When Ten Minutes Is Not Enough
Some repairs should not be forced into a quick patch. Large holes, wet drywall, mold, repeated cracking, loose panels, damaged corners, and holes near electrical or plumbing issues need more careful work. A fast surface patch can hide a problem without solving it.
If the drywall is soft from water, find and fix the moisture source before patching. If the wall moves when pressed, secure the panel before skim coating. If the damage keeps returning, the cause matters more than the filler.
The honest ten-minute goal is a clean first repair step. The final wall may still need drying, sanding, primer, paint, and texture work later.
Final Drywall Patch Review
A quick drywall patch succeeds when the edge is clean, the material is thin, the patch is supported, and the finish steps are not rushed. Tiny holes can be filled fast. Anchor holes need stable edges. Mesh patches need wide feathering. Larger holes need backing.
Keep the hands-on work neat, then let the wall dry before sanding, priming, texturing, and painting. That balance gives you the speed people want from a ten-minute repair without leaving behind the raised patch that everyone notices.


