Straight cuts come from a controlled setup, not from forcing the saw to behave at the last second. The board needs a reliable reference edge, the mark needs to be clear, the blade needs to cut on the waste side, and the workpiece needs enough support that it does not sag, twist, or pinch the blade halfway through the cut.
Beginners often think a crooked cut means they lack a steady hand. Sometimes that is true, but the bigger issue is usually the setup. A dull blade, an unsupported offcut, a thick pencil line, a bowed board, or a guide that was not clamped square can send even a careful cut off track.
Use this guide as a practical straight-cut routine for boards, trim, plywood, shelving, and small carpentry projects. The goal is to make each cut predictable before the saw starts moving.
A: Common causes include fuzzy layout, poor support, dull blade, no guide, or steering too hard.
A: Measure from the straightest reliable reference edge, not from a chipped or bowed side.
A: Cut on the waste side so the blade kerf does not shorten the finished part.
A: Yes, a square, straightedge, fence, or track makes straight cuts much easier to repeat.
A: Use the right blade, support the fibers, orient the good face correctly, and test on scrap.
A: Use a stop block or fixed setup rather than measuring every piece separately.
A: Feed steadily without forcing the saw or letting the blade wander.
A: Stop and fix the setup before cutting the rest of the parts.
A: Only small imperfections; crooked layout or major drift usually needs recutting.
A: Confirm reference edge, mark, waste side, blade, support, guide, and first-piece accuracy.
Decide How Straight the Cut Needs to Be
Not every cut needs the same level of precision. A rough blocking cut hidden inside a wall can tolerate more variation than a shelf edge, cabinet part, face frame, or visible trim return. Before setting up, decide whether the cut is rough, structural, visible, or part of a joint that must close tightly.
This decision affects the tool, the blade, and the amount of setup time. A quick framing cut can be made with a speed square and circular saw. A finish cut may need a fine blade, a clamped guide, a miter saw, a shooting board, or a test piece. Precision belongs where the finished project will show it.
When in doubt, treat the first cut as important. A straight first edge can become the reference for later marks. A careless first edge can make every later measurement harder to trust.
Start From a Reliable Edge
A straight cut begins before the line is drawn. If you measure from a crooked board end, a damaged corner, or an edge with bark, dents, or waviness, the cut may be wrong even if the saw follows the mark perfectly. Choose one edge or end that can be trusted.
For boards, trim one end square before measuring final length when accuracy matters. For plywood or sheet goods, check whether the factory edge is clean and undamaged. For reclaimed lumber, rough boards, or bowed material, create a straight reference with a guide, jointer, hand plane, track saw, or circular saw jig before laying out finished cuts.
Mark the reference edge lightly. If the board gets flipped on the bench, the mark reminds you where measurements should start. This small habit prevents many mismatched parts.
Use a Sharp, Thin Mark
A thick pencil line can hide a lot of uncertainty. Use a sharp pencil, fine mechanical pencil, or marking knife depending on the work. For framing and outdoor projects, a pencil is usually enough. For trim and furniture parts, a finer mark helps the blade land where you intend.
Make a small tick at the measurement, then use a square or straightedge to create the actual cut line. Do not rely on a dot alone. A full line gives the saw a path and makes it easier to see whether the blade is drifting.
If the board has a show face, mark lightly or place marks where they will be removed. On stained wood, heavy pencil marks can be harder to erase than expected.
Mark the Waste Side
Every cut has a keeper side and a waste side. Put an X, scribble, or arrow on the waste side as soon as the line is drawn. This tells you where the blade should remove material. It also prevents confusion when several pieces are marked at once.
Saw blades remove material. That removed strip is the kerf. If the blade cuts directly through the finished line instead of beside it, the keeper piece will usually be short. The blade should travel on the waste side of the line, with the edge of the teeth just touching or barely beside the mark depending on the tool and cut quality needed.
Before cutting, point to the keeper piece, the waste piece, and the blade path. It feels basic, but it catches the kind of mistake that ruins otherwise careful measuring.
Choose the Right Saw for the Cut
A handsaw can make clean small cuts when the work is supported and the line is clear. It is quiet, simple, and useful for quick trimming, small boards, and situations where power tools would be awkward. A sharp saw matters more than force.
A circular saw is flexible for framing lumber, plywood, shelving panels, and long cuts. It becomes much more accurate with a speed square, straightedge guide, or track. Freehand circular-saw cuts are useful for rough work, but visible edges deserve a guide.
A miter saw is useful for repeat crosscuts, trim, framing, and parts that need consistent angles. It is not a rip saw and should not be used to cut along the length of a board. A table saw is better for repeat rip cuts, but beginners should respect setup, push sticks, blade height, and kickback risks.
Match the Blade to the Material
A straight cut can still look bad if the blade is wrong. A rough framing blade cuts quickly but can tear plywood or trim. A fine-tooth blade cuts cleaner but may cut more slowly. A dull blade wanders, burns, chips edges, and makes the saw harder to control.
For plywood and finished panels, use a blade designed for cleaner cuts and support the sheet well. For framing lumber, a general-purpose or framing blade may be fine. For hardwood, trim, laminate, or veneered panels, a sharper, finer blade and slower feed can make a visible difference.
Check blade direction and installation. A blade mounted backward or poorly tightened creates rough cuts and unsafe behavior. Unplug or remove the battery before changing blades.
Support the Work Before Cutting
Wood moves when it is not supported. Long boards sag. Offcuts drop. Sheet goods flex. These movements can pinch the blade, tear fibers, or pull the saw off line. Support the keeper side and the waste side so the cut finishes cleanly.
Sawhorses, foam insulation sheets, benches, clamps, and scrap blocking can all help. For plywood, cutting on rigid foam supports the full sheet and lets the blade pass slightly into the foam. For long boards, support both ends so the board does not tip when the offcut separates.
Do not let the cut close around the blade. If the material pinches, stop safely and reset the support. A straight line on the wood is not enough if the board is fighting the saw.
Use a Square for Crosscuts
For crosscuts on boards, a speed square or combination square gives the saw a clean reference. Mark the line across the face, then either follow the line carefully or hold the square as a guide for the saw shoe. Keep the square tight to the reference edge.
If the edge is rounded, splintered, or crooked, the square may not sit correctly. Clean the edge or choose a better reference before drawing the line. A square can only transfer the accuracy of the edge it rests against.
When using a circular saw against a speed square, keep the saw shoe firmly against the square while cutting. Do not twist the saw to correct halfway through. If the blade begins to drift, stop and reset rather than forcing the tool sideways.
Clamp a Guide for Long Cuts
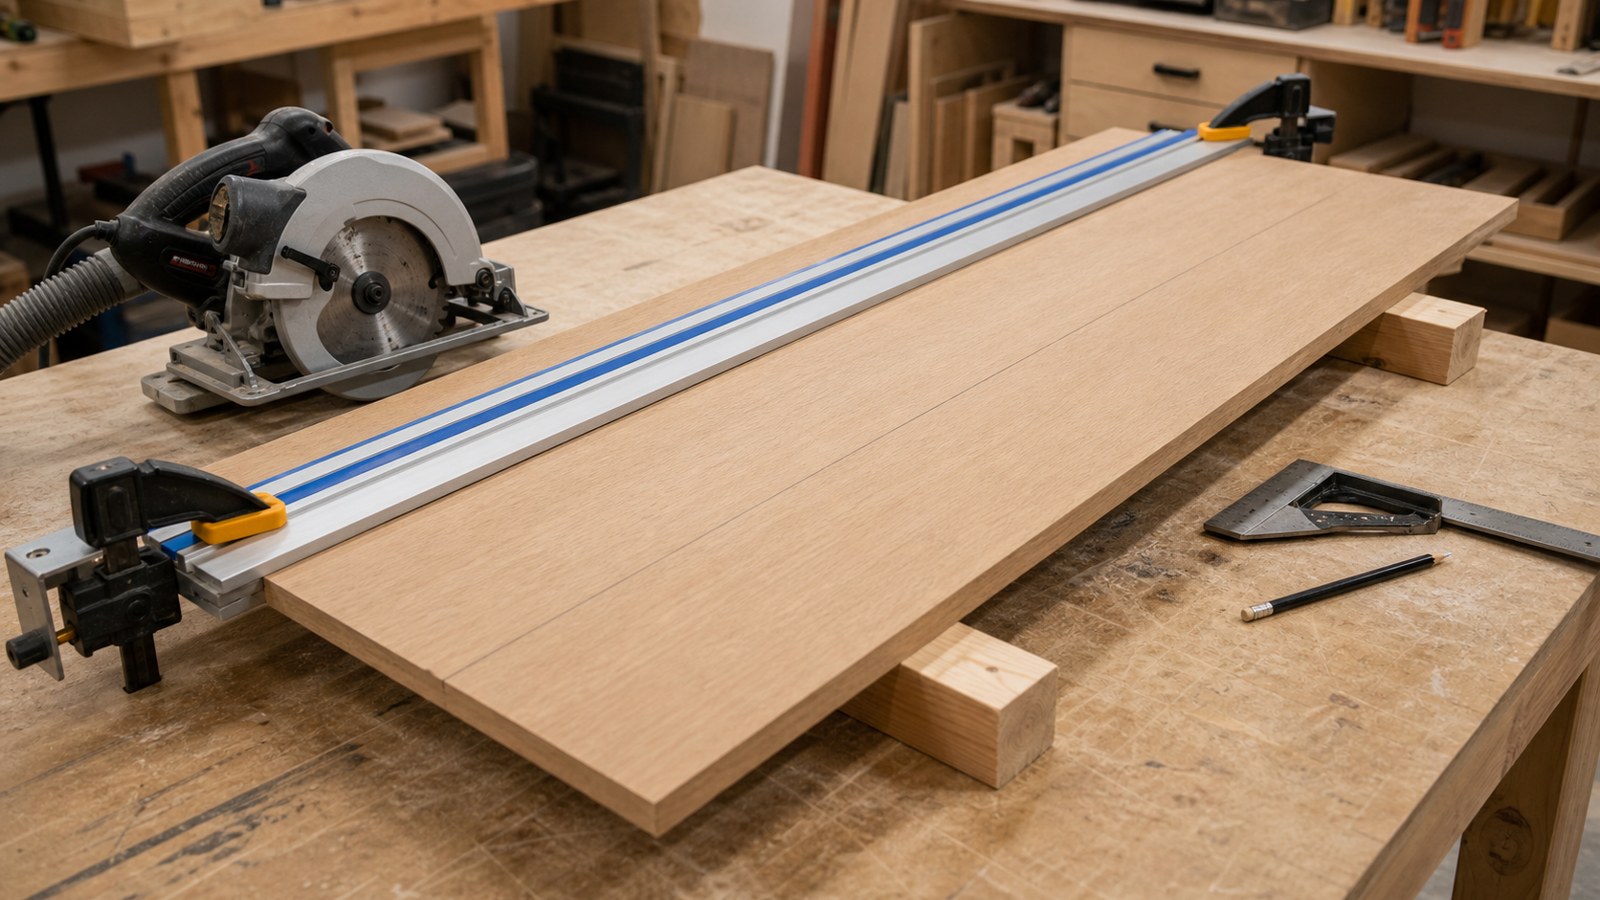
Long rip cuts are difficult to make straight by eye. Clamp a straightedge, track, level, factory-edge plywood strip, or saw guide parallel to the cut line. Measure the offset from the saw blade to the edge of the saw shoe, then place the guide so the blade lands on the waste side.
Check the guide at both ends and in the middle before cutting. A guide that is clamped slightly crooked will produce a clean, straight, wrong cut. If the cut is important, make a test cut on scrap or leave extra material for trimming.
Keep the saw shoe against the guide without forcing it. Steady pressure is enough. Pushing hard sideways can bind the blade or move a poorly clamped guide.
Let the Saw Reach Speed
Start the saw before the blade touches the wood unless the tool instructions say otherwise. Let it reach full speed, then enter the cut smoothly. Starting with the blade already pressed into the wood can jerk the tool, chip the edge, or make the first inch crooked.
Feed the saw at a pace the blade can handle. Too fast can wander, burn, or bog down. Too slow can burn wood with some blades. Listen to the tool and watch the line. A clean cut usually sounds steady.
Near the end of the cut, keep supporting the saw and the offcut. Many cuts go crooked in the final inch because the waste piece drops or the user relaxes too early.
Cut With the Good Face in Mind
Tear-out often happens where the blade exits the material. With a circular saw, the blade usually cuts upward through the top face, so the cleaner face is often placed down. With a table saw, the cleaner face is often up. The exact choice depends on the tool and blade.
For visible surfaces, use painter’s tape, a sharp blade, backing material, scoring cuts, or a zero-clearance support when needed. Plywood, veneer, laminate, and prefinished boards are especially prone to chipped edges.
If both faces matter, test on scrap first. The best technique is the one that leaves the visible edge clean on the material you are actually using.
Make Repeat Cuts With a Stop
If several boards need the same length, do not measure each one from scratch unless the work is rough. Cut the first piece carefully, confirm it is correct, then use a stop block, story stick, or setup piece for the rest. This keeps matching parts consistent.
Keep sawdust away from the stop block. A small chip trapped against the stop can change the length of a piece. Push each board against the stop with the same pressure and check the batch occasionally.
For miter saws, never trap a loose offcut between the blade and a stop in a way that can pinch or kick. Use stops thoughtfully and keep hands clear of the blade path.
Check the First Cut Before Batching
The first cut tells you whether the setup is right. Measure the finished piece, check the edge against a square, and dry-fit it if possible. If the first piece is short, angled, chipped, or rough, fix the setup before making ten more matching mistakes.
Look at the cause, not just the result. Was the line wrong? Did the guide move? Did the blade cut on the wrong side? Was the board unsupported? Was the saw shoe tilted? Each answer points to a different correction.
Once the first piece is correct, the rest of the batch becomes easier. A careful first cut is faster than repairing a full pile of bad parts.
Clean Up Small Imperfections
Even careful cuts sometimes need tuning. A block plane, sanding block, file, rasp, shooting board, or trim router can clean an edge depending on the material. The key is to remove material evenly without rounding a square edge that needs to stay straight.
For visible trim and shelves, tune the edge before finishing. For parts that meet another piece, check the fit as you tune. Sanding blindly can make an edge look smoother while slowly changing the length or angle.
If a cut is badly crooked, recutting may be better than trying to rescue it. There is no honor in spending twenty minutes sanding a part that could be remade cleanly in two.
Final Straight-Cut Review
To cut wood straight, start with a reliable reference, draw a clear line, mark the waste side, choose the right saw and blade, support the work, and use a square or guide when the cut needs to be accurate. Let the saw do steady work instead of forcing it through a weak setup.
Good cuts make the rest of a project easier. Shelves fit better, trim closes tighter, frames stay square, and beginner carpentry feels less like guessing. Straight cutting is not one trick; it is a sequence of small choices that keep the saw on a path it can follow.