Fast Woodworking Projects Using Only Hand Tools Depend on Layout More Than Speed
Fast Woodworking Projects Using Only Hand Tools are not about rushing through cuts. They become fast because the project has few parts, the layout is clear, and each tool is sharp enough to do its job without a fight. This guide explains how to choose quick builds, work accurately, and finish useful pieces with a saw, plane, chisels, clamps, and a patient sequence that still feels efficient.
Pick the Right Kind of Fast
Hand-tool projects become fast when the design is honest about what the tools do well. Straight cuts, small boards, visible edges, and simple joints reward careful layout more than force. The goal is not to imitate a machine shop without machines. The goal is to build something useful with a calm sequence that leaves fewer mistakes to repair.
Prepared stock shortens the learning curve. Straight, dry boards let a beginner focus on measuring, sawing, planing, and assembly instead of fighting twist and cup from the first minute. That does not mean every board must be perfect. It means the project should not ask new skills to compensate for impossible material.
Layout is the main hand-tool skill because every later step follows those marks. A square line, a clear waste side, and a reference face can prevent most beginner errors before the saw starts. When two parts must match, marking them together is usually better than measuring twice from memory. Accurate layout makes the work feel slower at first and faster by the end.
Fast also means choosing a finish line that is reachable. A beginner can always add decorative details, but the project should work before it becomes complicated. Pick an object with a clear use, then decide which single skill deserves attention. That discipline keeps the build moving and makes the lesson easier to remember.
Start With Prepared Stock
Sawing should leave room for cleanup when accuracy matters. Beginners often try to split the finished line and end up with a part that is slightly short or ragged. Cutting on the waste side and trimming with a plane or sanding block creates a cleaner result. The extra step is often quicker than repairing a bad cut. Project boards sold surfaced on four sides are especially helpful for this style of work because they let the builder spend time on layout and fit instead of rough milling. That does not remove craftsmanship; it simply aims the effort at the skills a quick project is meant to teach.
Make Layout the Main Skill
Planes are useful because they tune fit and improve touch at the same time. A small chamfer can make a simple crate or shelf feel intentional, while a few controlled passes can bring a stubborn edge into line. The tool rewards sharpness and direction. If it chatters or tears, the answer is usually setup, grain reading, or lighter cuts.
Joinery should match the purpose of the project. A tray does not need heirloom joinery to be successful, and a quick shelf should not become a semester-long exercise unless that is the goal. Rabbets, dowels, screws, and glue blocks all have honest places. Strength matters, but so does finishing the project while the lesson is still fresh.
Reference marks should stay visible until they have done their job. Beginners sometimes erase or sand away layout too early, then wonder why parts no longer agree. Mark faces, edges, and waste clearly, and keep the system consistent from board to board. A few extra marks can prevent a surprising amount of rework.
Saw With Room for Cleanup
Dry fitting is where hand-tool speed is protected. Parts that seem close on the bench can shift when clamps, glue, or fasteners enter the process. A dry run shows whether the sequence works and whether every clamp has room to land. It also reveals whether a project can be assembled by one person without panic. Clamps are helpful only when they hold the work in the correct shape. Too much pressure can bow thin boards, twist a frame, or squeeze out so much glue that cleanup becomes harder than assembly. Check diagonals and flatness before the glue starts to grab. A slower clamp-up usually produces a cleaner fast project.
Finishing small pieces deserves the same respect as cutting them. Sharp corners can feel unfinished even when the joinery is sound, and uneven sanding can make stain or oil look blotchy. A quick project should still be pleasant to touch. The finish is where a simple build becomes something someone wants to keep.
Use Planes for Fit and Finish
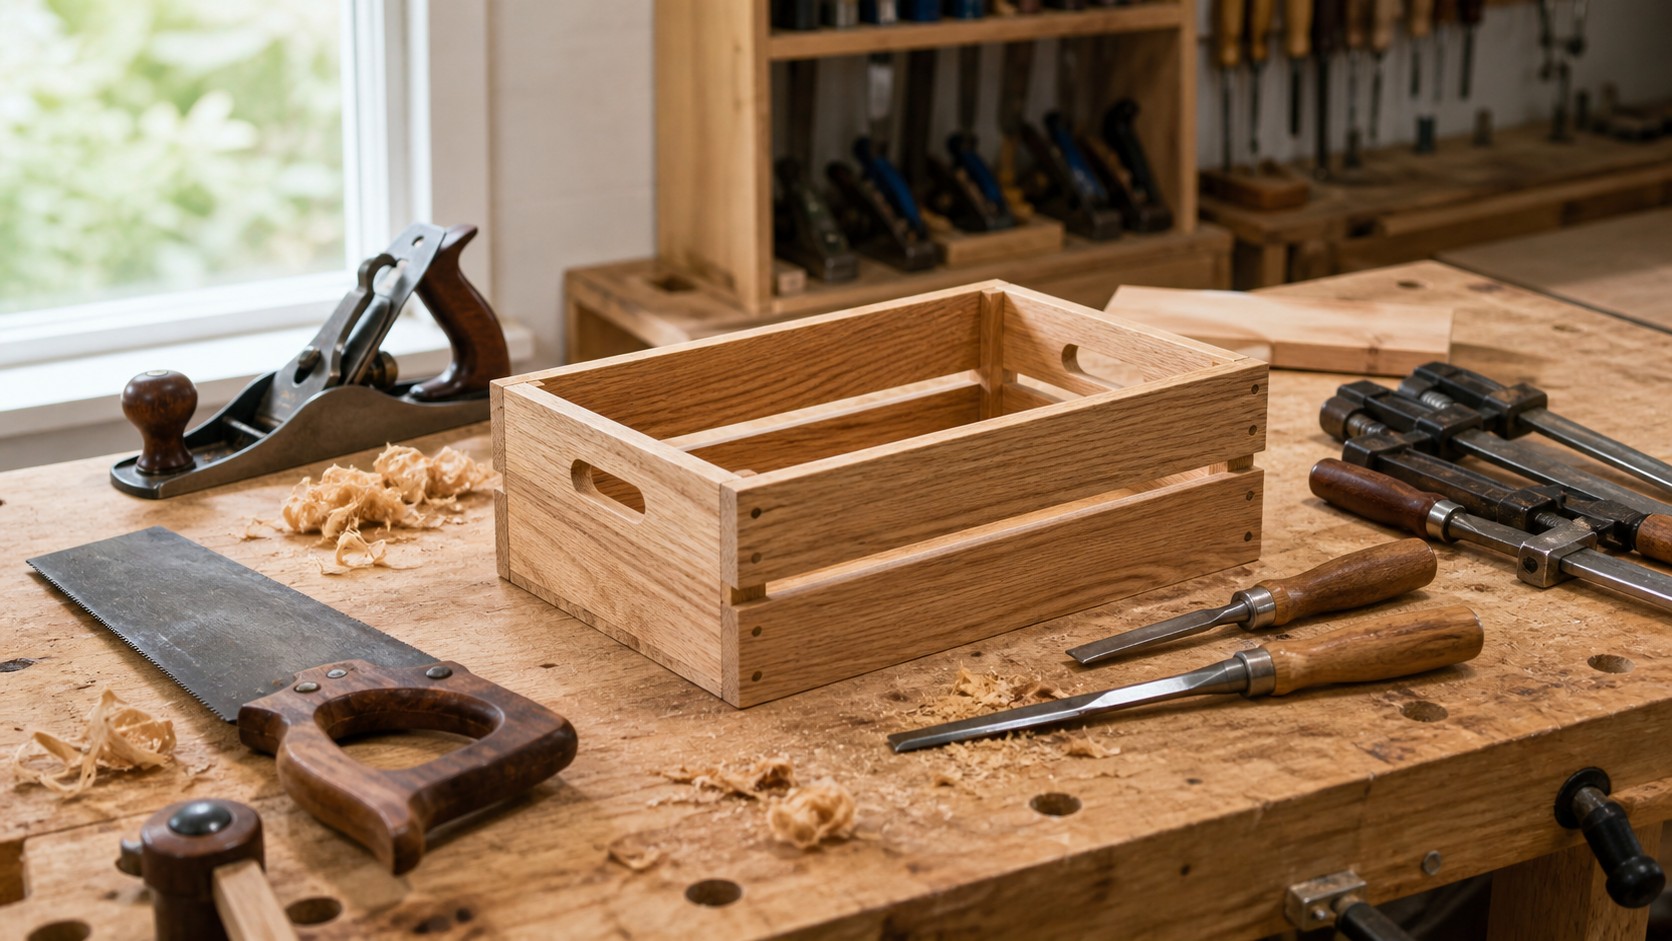
A repeatable hand-tool kit helps the next build begin without a shopping trip. Saw, square, marking tool, block plane, chisels, clamps, sanding block, drill, and glue cover many small projects. The kit does not need to be large. It needs to be sharp, reachable, and familiar. A plane can also rescue tiny fitting errors without making the project look repaired. One careful pass along an edge may remove the thickness of a pencil line; several uncontrolled passes may change the part completely. Learn to stop, test fit, and stop again. Hand-tool accuracy depends as much on restraint as effort.
Keep Joinery Honest
Mistakes are useful when they are measured instead of hidden immediately. A crooked cut can show whether the saw started poorly or drifted because the board moved. A gap can reveal a layout error or a clamping problem. Reading mistakes this way turns a fast project into real practice.
Simplicity is what makes hand-tool projects satisfying. A small shelf with crisp edges is better than an ambitious piece that stalls halfway through. The project should teach one or two skills clearly and then be done. Finishing is not a lower goal than complexity; for beginners, it is often the lesson that matters most.
Dry Fit Before Glue
A dry fit should include the exact clamps and cauls that will be used during glue-up. This is where a beginner learns whether parts slide under pressure, whether corners stay square, and whether the assembly order makes sense. It is much easier to adjust a plan before glue starts setting. Hand-tool work feels faster when assembly has already been rehearsed.
Small gaps should be understood before they are hidden. Sometimes a gap shows a board that needs one more plane pass; sometimes it shows a layout mark that was transferred from the wrong edge. Correcting the reason teaches more than simply filling the line. The next project benefits from that attention.
Hardware also belongs in the dry fit. Screws, nails, dowels, and handles can interfere with clamps or expose a measurement problem late in the build. Set them in place before committing. A few quiet minutes at this stage can save a very noisy repair.
If the dry fit feels awkward, change the process before reaching for glue. Add temporary blocks, rehearse clamp placement, or divide the assembly into smaller steps. A simple project should not require a last-second balancing act. The bench rehearsal is where the builder earns a calm glue-up.
Clamp Without Distorting the Work
Clamp pressure should bring parts together, not force them into a shape they do not want to hold. If a frame twists under pressure, loosen the clamps and correct the surfaces or sequence. A fast build that dries crooked is no longer fast. Let the tools persuade the wood instead of bullying it.
Finish Small Pieces Carefully
Finishing begins with touch. Run a hand over corners, edges, and faces before applying oil, paint, or wax. The eye may accept a sharp edge that the hand dislikes immediately. Small chamfers, eased corners, and clean end grain make even quick projects feel cared for.
Different finishes suit different fast projects. Oil can be forgiving on a serving board, paint can unify simple pine, and wax can soften shop jigs that do not need heavy protection. The finish should not make the project harder than the build itself. Choose a surface treatment that fits the object and the available drying time.
End grain often needs extra attention because it absorbs finish differently from long grain. A quick hand-tool project can look uneven if the ends are left rough or thirsty. Sand or plane them cleanly and test finish on an offcut. The small parts of the project are usually the parts people touch first.
Create a Repeatable Hand-Tool Kit
A small hand-tool kit should be sharpened and reset before it is stored. Dull tools make the next project start badly, while a clean saw and ready plane invite another build. Maintenance does not have to be elaborate. It just has to happen before the lesson from the current project fades. Tool familiarity is one reason hand-tool projects become faster. The builder learns how a saw starts, how a plane sounds when it is cutting well, and how much clamp pressure is enough. Those small signals are hard to buy. They come from using a modest kit repeatedly.
Storage should protect edges. Chisels tossed into a drawer become dull or dangerous, and a plane left with its iron exposed can nick both tool and hand. Simple racks, rolls, or boxes make the kit safer. The project is finished only when the tools are ready for the next one.
Use Mistakes as Measuring Tools
Mistakes should be saved long enough to learn from them. A short offcut with a wandering kerf can become a reference for stance or saw angle. A split pilot hole can show that the screw was too large or too close to the end. Treat these scraps as evidence, then move on. The best mistake review happens while the project is still fresh. Write down the one thing that caused the most trouble and the one step that worked better than expected. That short reflection turns a quick build into a better next build. Skill accumulates when lessons are named.
Let the Project Stay Simple
Simple projects still leave room for taste. Proportion, wood grain, edge shape, and finish color all affect the final piece without adding unnecessary joinery. A fast hand-tool build can look calm and intentional when those choices are made deliberately. The goal is not plainness; it is clarity. This approach also keeps motivation high. A completed object gives feedback that a half-finished ambitious build never can, and that feedback makes the next hand-tool session more confident.
The best next project is usually the one that repeats one familiar skill and adds one new challenge. That might mean the same tray with cleaner corners, or a peg rail with more careful spacing. Progress stays visible without becoming overwhelming. Hand-tool woodworking rewards this steady rhythm.
A finished simple project creates confidence that plans alone cannot provide. The shelf, tote, tray, or bench hook may be modest, but it proves the builder can move from rough board to useful object. That proof matters. It makes the next project feel less like a guess and more like a continuation.