A wooden bed frame is a good DIY project because the shape is simple, but it still has to do real work every night. The frame needs to fit the mattress, stay square, support weight evenly, avoid squeaks, clear the floor, move through doors, and look finished enough to belong in the bedroom.
The best beginner-friendly design is not the fanciest photo online. It is a frame with clear measurements, strong corners, reliable center support, smooth edges, and hardware that can be tightened or removed later. When those basics are planned before cutting lumber, the project becomes much easier to build cleanly.
A: Measure the actual mattress and the room path before cutting frame parts.
A: No. Check spacing, center support, airflow, and warranty guidance for the mattress type.
A: Squeaks usually come from loose fasteners, rubbing parts, moving slats, or contact with the floor.
A: Larger frames usually need one, especially queen, king, heavy foam, or storage designs.
A: Follow the mattress guidance and keep spacing consistent so support is even.
A: Yes, if it must move through doorways, stairs, apartments, or future room changes.
A: Use straight, stable boards for rails and supports, with attractive stock saved for visible edges.
A: Use pads, glides, wider feet, or a rug plan before the loaded frame sits in place.
A: Sand and soften touchable edges before final assembly blocks access to corners and inside faces.
A: Load the bed, shift weight, listen for noise, check support, and retighten hardware before styling.
Start With the Mattress Size
The mattress controls the whole project. A twin, full, queen, king, and California king all need different inside dimensions, support layouts, and room clearance. Measure the actual mattress before building, especially if it is older, thicker, boxed, or from a brand with slightly different sizing.
Leave enough room for bedding without letting the mattress slide around. A frame that is too tight makes sheets hard to tuck and can rub the mattress edge. A frame that is too loose looks unfinished and can let the mattress shift every time someone sits down.
Check Mattress Support Requirements
Modern mattresses often have specific support rules. Foam and hybrid mattresses may require close slat spacing or a solid platform. Some warranties are affected by wide gaps, weak center rails, or missing legs. Before choosing a design, check what the mattress maker expects underneath it.
This is where many simple bed frames fail. The outer rectangle may look strong, but the mattress sags between slats or dips along the middle. Good support is not only about comfort; it also protects the mattress from premature wear.
Choose a Platform, Rail, or Box Style
A simple platform bed uses a flat support surface or closely spaced slats inside a low frame. A rail-style bed uses side rails, a headboard, footboard, and slats or a center beam. A box-style base can look solid and modern, and it can sometimes include storage.
For a first build, choose the style that matches your tools and room. A clean platform frame with legs, slats, and a center support is often easier than a decorative headboard with panels and joinery. You can always add a headboard later after the base proves itself.
Design for the Room It Will Live In
A bed frame that looks good in a plan can feel wrong in the bedroom if it is too tall, too wide, too sharp, or too heavy-looking. Think about nightstands, outlet locations, baseboards, rug thickness, closet doors, drawers, and walking paths around the bed.
Shin-height corners matter. If the frame extends beyond the mattress, round or soften the corners and consider how people move in the dark. A frame should feel sturdy, not like furniture that punishes everyone who walks past it.
Make Sure It Can Leave the Room
Do not build a bed frame as one giant permanent object unless you are certain it can move through doors, stairways, and hallways. Most DIY frames should come apart into rails, legs, slats, and headboard pieces. Disassembly also makes finishing and repairs easier.
Bolts, threaded inserts, bed rail brackets, corner plates, or knock-down hardware can help. Screws alone can work for some simple frames, but repeated moving can wear out screw holes. If the bed may move apartments or rooms, design that into the project from the beginning.
Pick Straight, Stable Lumber
Bed frames are long enough that crooked boards cause real trouble. Twisted rails make the mattress sit unevenly. Bowed boards can pull corners out of square. Cupped slats can create high spots. Spend time choosing straight lumber and let boards acclimate if they have been stored in a different environment.
Construction lumber can work for rustic or budget frames, but it needs careful selection and sanding. Hardwood, plywood, poplar, pine, and dimensional softwood all have uses. Choose material based on the look, strength, budget, and tools you actually have.
Use a Clear Cut List
A bed frame has repeated parts, so a cut list keeps mistakes from multiplying. Write down the long rails, short rails, legs, center support, slats, cleats, headboard pieces, blocking, and trim before cutting. Mark which dimensions are outside dimensions and which are inside mattress dimensions.
Cut matching parts together when possible, and label them as you go. A rail that is one quarter inch different from its mate can make the frame hard to square. Accuracy here saves a lot of frustration during assembly.
Build the Outer Frame Square
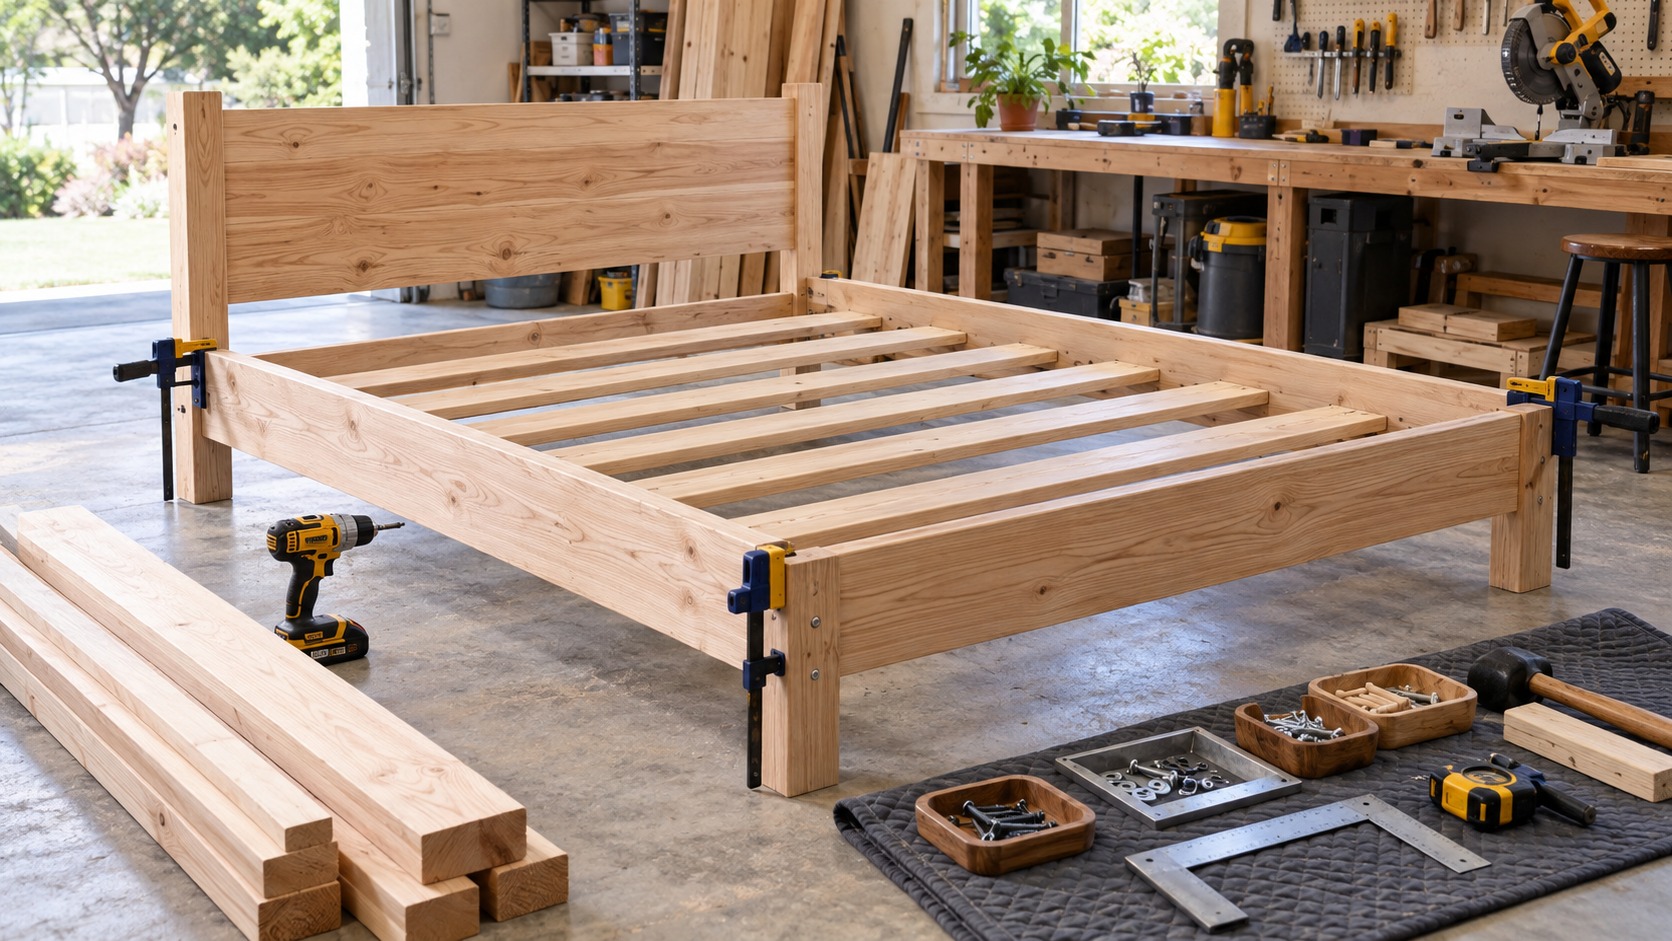
The outer rectangle sets the bed’s shape. Work on the flattest surface available, clamp parts when possible, and measure diagonals before fastening everything permanently. If the diagonals match, the frame is square. If they do not, adjust before adding slats or supports.
Corner blocks, brackets, half-lap joints, pocket holes, bed bolts, or simple screwed construction can all work depending on the design. The important thing is that the corners resist racking. A bed frame gets pushed, sat on, and shifted constantly, so weak corners become squeaky corners.
Plan the Center Rail Early
Queen and king beds usually need a center rail with legs that transfer load to the floor. Without it, slats can sag, the mattress can dip, and the side rails can bow inward. The center support should be straight, well attached, and tall enough that it actually carries weight.
Center legs should touch the floor without lifting the outer frame. If the floor is uneven, adjustable feet can help. A floating center rail that does not reach the floor may look fine during assembly and fail during use.
Space Slats Correctly
Slats hold the mattress and distribute weight. Their spacing should match the mattress requirements and the strength of the slat material. Wide gaps may work under an old box spring but can be a problem under foam or hybrid mattresses.
Attach slats so they do not slide, rattle, or bunch up. A spacer block makes layout faster and more consistent. If the design uses a plywood deck instead, add ventilation where appropriate and make sure panels are supported so edges do not flex.
Choose Fasteners That Match the Load
A bed frame is not a picture frame. It needs fasteners that handle movement, weight, and occasional disassembly. Screws should be long enough to grip properly without poking through. Bolts should have washers where needed. Inserts should be installed square and deep enough to hold.
Pre-drill near board ends to prevent splitting. Countersink exposed screw heads. If using pocket holes, place them where they can resist the direction of force and where they will not be visible or uncomfortable. Hardware should support the design rather than rescue weak joinery.
Prevent Squeaks Before They Start
Squeaks usually come from movement: wood rubbing wood, metal rubbing metal, loose bolts, shifting slats, or legs rocking on the floor. Tight joinery helps, but so does planning for the places where pieces meet. Washers, felt, cork, paste wax, or thin fabric can quiet some contact points.
Do not hide every joint behind glue if the frame may need to be tightened later. A bed that can be serviced is better than one that looks permanent but slowly loosens. After assembly, sit, shift, and move on the frame before adding bedding so noises are easier to find.
Keep the Design Easy to Clean
A bed frame collects dust, lint, pet hair, and lost items. Very low platforms can look sleek but make cleaning difficult. Storage bases can be useful, but only if drawers or compartments move easily and do not trap dust in unreachable corners.
Think about vacuum clearance, under-bed storage bins, and how often the room is cleaned. A simple frame with enough clearance for a vacuum may be more practical than a dramatic low design that turns maintenance into a chore.
Round Over Touchable Edges
Every edge someone might touch should be sanded smooth. This includes rail tops, corners, leg edges, headboard edges, slat ends, and the places where bedding rubs. Sharp edges can snag sheets, scratch legs, and make the frame feel unfinished.
A router roundover bit is helpful, but sanding blocks can do a lot. Break sharp corners even on hidden parts. Splinters under a mattress or along a bed rail are not charming rustic detail; they are a sign the project was rushed.
Sand Before Final Assembly When Possible
Large bed frames have corners and inside faces that become awkward after assembly. Sand rails, slats, legs, and headboard pieces before the final build, then do a final touch-up after fastening. This makes the finish feel more consistent.
Work through appropriate grits instead of stopping after rough sanding. The finish will reveal scratches, glue smears, and uneven sanding. A simple design looks much better when the surface preparation is calm and even.
Test the Finish on Scrap
Paint, stain, oil, clear coat, and tinted finishes all behave differently depending on wood species and sanding. Pine can blotch. Plywood edges can drink finish. Construction lumber can show mill marks and dents. Test on offcuts from the same boards before coating the finished frame.
Let the finish cure before putting the mattress and bedding back on the frame. A finish that feels dry may still smell, stick, or mark fabric. Bedrooms need finishes that are durable enough for cleaning and pleasant enough to live with up close.
Consider a Simple Headboard
A headboard can make a basic frame look more complete, but it does not need to be complicated. Vertical boards, a plywood panel with trim, a slatted design, or a simple upholstered panel can all work. The headboard should attach securely without making the bed impossible to move.
Think about pillows, outlets, windows, and wall trim. A headboard that blocks an outlet or bangs the wall every time someone leans back needs adjustment. Add felt pads or wall bumpers where contact is likely.
Add Storage Carefully
Under-bed storage is useful, but it changes the project. Drawers need clearance, square openings, smooth slides, and room to pull out beside nightstands or walls. Lift-up storage requires stronger hardware and safe access. Open cubbies need clean edges because they stay visible.
For a first frame, removable bins under a raised platform may be smarter than built-in drawers. They deliver storage without turning the bed into a cabinetmaking project. Built-ins can come later once the basic frame design is proven.
Protect the Floor
Bed legs concentrate weight, and the frame moves slightly during normal use. Hardwood, laminate, vinyl, and tile can be scratched or dented if the legs have rough bottoms. Felt pads, rubber feet, glides, or a rug can protect the floor and reduce noise.
Use protection that matches the flooring. Some rubber products can discolor certain vinyl floors, while thin felt can compress under heavy weight. Check the floor after the first few days and again after the bed has been used for a while.
Test the Frame Before Styling It
Before adding the full bedding setup, test the frame. Check diagonal measurements, press on corners, sit on each side, listen for squeaks, and confirm that slats stay in place. Look underneath to make sure center legs touch the floor and fasteners are tight.
This is the easiest moment to fix problems. Once the mattress, pillows, blankets, and room decor are back in place, small issues become easier to ignore until they become annoying. A few minutes of testing can prevent months of creaking.
Keep the Look Proportional
A simple bed frame can look expensive when the proportions are right. Rails should not feel too bulky for the mattress. Legs should not look spindly under a heavy frame. A headboard should match the scale of the room and the bed height.
Mock up critical dimensions with painter’s tape or scrap wood if needed. Check the bed height with the mattress included, not just the frame. A frame that looks low in the shop may become tall once the mattress and bedding are added.
Plan for Repairs and Tightening
Wood moves, hardware settles, and beds get used every night. Design access to bolts, brackets, and slats so the frame can be tightened. Keep a small note with hardware sizes and finish details in case something needs repair later.
If a squeak appears months later, start with the easy checks: loose bolts, moving slats, dry wood-on-wood contact, and legs shifting on the floor. A frame built with serviceable joints is much easier to quiet than one glued and screwed into a mystery.
Use a Sensible Build Order
A calm build order helps: confirm mattress dimensions, choose the style, buy straight lumber, make a cut list, cut matching parts, sand touch points, dry-fit the frame, drill for hardware, assemble the base square, add center support, place slats, test the frame, then finish or touch up as needed.
Do not rush into final assembly before checking the room and stair path. Do not apply finish before test-fitting hardware that might scratch it. The order matters because bed frames are large enough that mistakes become awkward to correct.
Final Bed Frame Review
A good wooden bed frame is strong, quiet, smooth, and practical. It fits the mattress, supports the center, uses slats or decking correctly, protects the floor, and can be moved or tightened later. None of those details require advanced woodworking, but they do require planning.
Keep the first version simple and build it well. Square corners, solid support, comfortable edges, and a clean finish will do more for the room than unnecessary decoration. Once the basic frame works, headboards, storage, nicer wood, or decorative details become easier upgrades instead of distractions from the structure.