Beginner welding projects should teach control before they try to prove strength. The first goal is to learn how clean metal, tight fit-up, steady travel speed, and patient tacking affect the weld bead. A small shop project that can be inspected from every side is a better starting point than anything that has to carry a person, hold a vehicle part, contain pressure, or support a structure.
Start with mild steel, simple joints, and projects that remain useful even if the first version is not pretty. Practice coupons, shop hooks, small brackets, plant stands, firewood racks, welding cart accessories, and simple frames all teach real skills without hiding mistakes behind paint or grinding. The right beginner project gives you room to stop, inspect, adjust the welder, clean the joint again, and try another bead before the mistake becomes part of something important.
A: Start with practice coupons before building hooks, brackets, shelves, or racks.
A: Mild steel is usually the best first material because it is common and forgiving.
A: Very important. Dirty metal can cause porosity, poor starts, and misleading bead behavior.
A: Tacks hold alignment while still allowing correction before final welding locks the project.
A: Use short welds, skip around, clamp well, and let the metal cool between sections.
A: No. Grind only for fit, safety, appearance, or a specific finish requirement.
A: Magnets help, but clamps and stops are more reliable for accurate fit-up.
A: Avoid structural, vehicle, lifting, pressure, fire-critical, and safety repairs as a beginner.
A: Track settings, fit-up, bead shape, heat control, and project squareness in a notebook.
A: Inspect fire safety, fit-up, tack alignment, bead quality, sharp edges, finish, and project use.
Choose Practice Before Performance
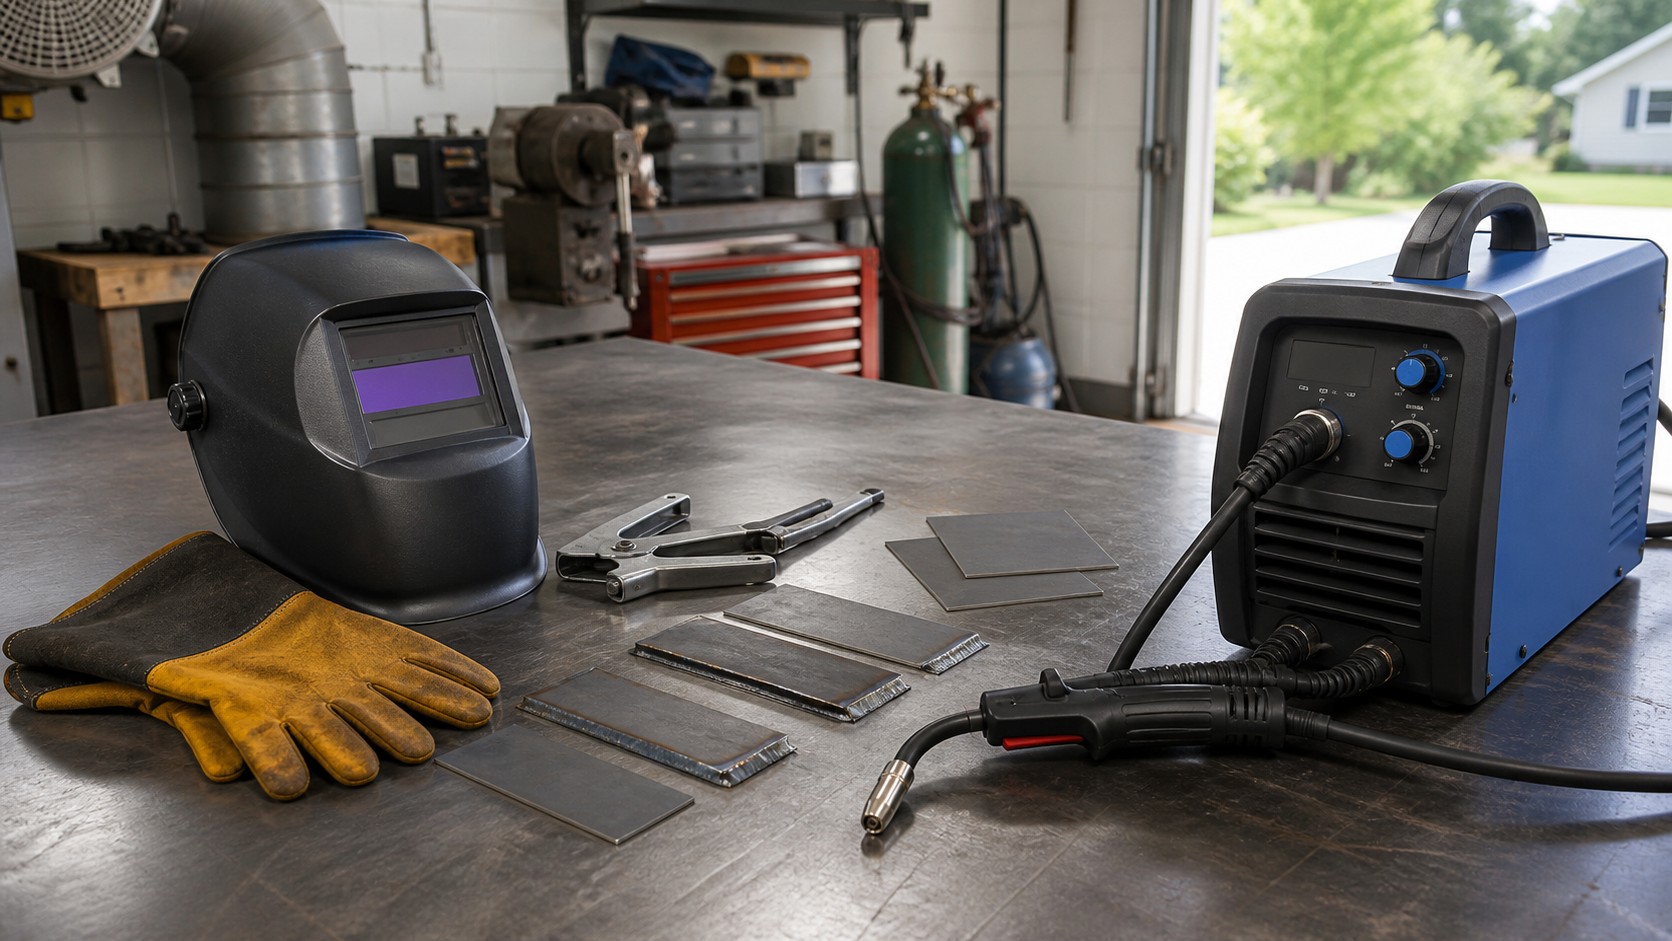
A new welder needs repetitions more than a dramatic first build. Flat coupons, lap joints, T-joints, outside corners, and short pieces of square tube teach the same movements that later projects use. They also let you cut, bend, hammer, and inspect the weld without worrying about ruining a finished item.
Practice pieces should be labeled with the machine setting, wire or rod size, material thickness, and joint type. That turns each bead into a record instead of a blur of sparks. When a setting works, you have a note to repeat. When a bead looks ropey, cold, undercut, or full of porosity, you have a specific condition to troubleshoot.
Set Up a Fire-Safe Work Area
Welding throws sparks farther than most beginners expect. Clear sawdust, cardboard, rags, solvents, dry leaves, plastic containers, and aerosol cans from the area before the helmet goes down. Keep a fire extinguisher nearby, check what is behind and below the weld area, and stay around after welding long enough to catch anything smoldering.
Ventilation matters too. Do not weld painted, oily, galvanized, plated, or unknown metal just because it is sitting in the scrap pile. Zinc coatings, paint, cleaners, and residues can create dangerous fumes. If the metal cannot be identified and cleaned safely, choose a different piece or get help from someone who understands the material.
Wear Gear That Lets You Work Calmly
Good protective gear is not only about avoiding injury. It lets you hold position without flinching. Use a welding helmet with the correct shade, safety glasses underneath, leather gloves, cotton or leather clothing, hearing protection when grinding, and boots that sparks cannot fall into easily.
Avoid synthetic sleeves and loose cuffs. Hot spatter can melt synthetic fabric quickly, and loose clothing can catch sparks or snag on clamps. Comfort matters, but welding clothing should still be chosen around heat, light, and sparks rather than the weather alone.
Start With Mild Steel
Mild steel is the most forgiving material for early projects. It is widely available, relatively inexpensive, and easier to read than aluminum, stainless, cast iron, or thin automotive sheet metal. Flat bar, angle iron, small plate, and square tube in moderate thickness give the beginner time to see the puddle without instantly burning through.
Material that is too thin can be frustrating because heat builds quickly. Material that is too thick may require more machine capacity and better joint preparation than a small beginner welder can handle. For early projects, choose steel that matches the machine and the process rather than forcing a small welder to do heavy work.
Clean Metal Like It Counts
Dirty metal teaches bad lessons. Mill scale, rust, paint, oil, grease, cutting fluid, and dust can all change the arc and contaminate the weld. A wire wheel, flap disc, grinder, file, degreaser, and clean rag should be part of the setup before the welder is turned on.
Clean more than the exact bead line. The ground clamp needs clean contact, and the surrounding area should be free of residue that can burn into the weld. If the arc suddenly acts erratic, cleaning and grounding are two of the first things to check.
Cut Parts Square Enough to Fit
Good welding starts before the arc. If two pieces meet with large gaps, crooked ends, or burrs that hold the joint open, the beginner has to fight the fit-up while trying to control heat. Square cuts and deburred edges make the weld easier to place and easier to inspect.
Use a speed square, scribe, soapstone, cutoff wheel, saw, file, and grinder to prepare the parts. For tubing and angle, check that both ends sit flat on the bench. A small correction at the cutting stage can save a long struggle during welding.
Tack Everything Before Final Welding
Tack welds are the beginner’s best insurance. A few small tacks hold the project together while still leaving room to correct square, spacing, and alignment. A project that is fully welded too soon can twist out of shape and become difficult to fix without cutting it apart.
Place tacks where they will not block the final bead or force the torch into an awkward angle. After tacking, check diagonals, level, flatness, and clamp pressure. If the part moved, break a tack and correct it before adding more heat.
Build a Set of Practice Coupons
The simplest first project is a stack of practice coupons. Cut several matching strips of mild steel and run beads in straight lines. Then make lap joints, T-joints, and butt joints. Brush each weld clean and compare bead width, tie-in, spatter, travel angle, and the shape of the bead edge.
Do not grind the coupons smooth immediately. Grinding can hide the very information you need to learn from. Look at the weld first, photograph it if helpful, then cut or bend a few samples when it is safe to see whether the weld is actually tying into the base metal.
Make a Simple Shop Hook Rack
A hook rack is a useful beginner project because it teaches layout, repeated parts, fillet welds, and light-duty mounting without asking the welds to do life-safety work. A flat backing bar with several bent or cut hooks can hold cords, welding leads, clamps, extension cords, or light shop tools.
Keep the design modest. Mark hook locations, tack each hook, check spacing, then weld in short sections to reduce heat distortion. Mount the rack with suitable fasteners into solid framing or a workbench, and load it gradually. If the welds or backing flex, rebuild the weak area before trusting it with more weight.
Try a Small Right-Angle Bracket
A bracket teaches square corners, inside fillets, outside edges, hole placement, and clamping. Use two pieces of angle or flat bar with a small gusset. The gusset helps the beginner see how triangulation stiffens a part while also adding another joint to practice.
Drill holes before welding when access will be easier, and deburr them so the bracket sits flat. After welding, check the bracket against a square. If it pulled out of alignment, note where heat was concentrated and adjust the tack and weld order on the next version.
Build a Plant Stand or Small Shelf Frame
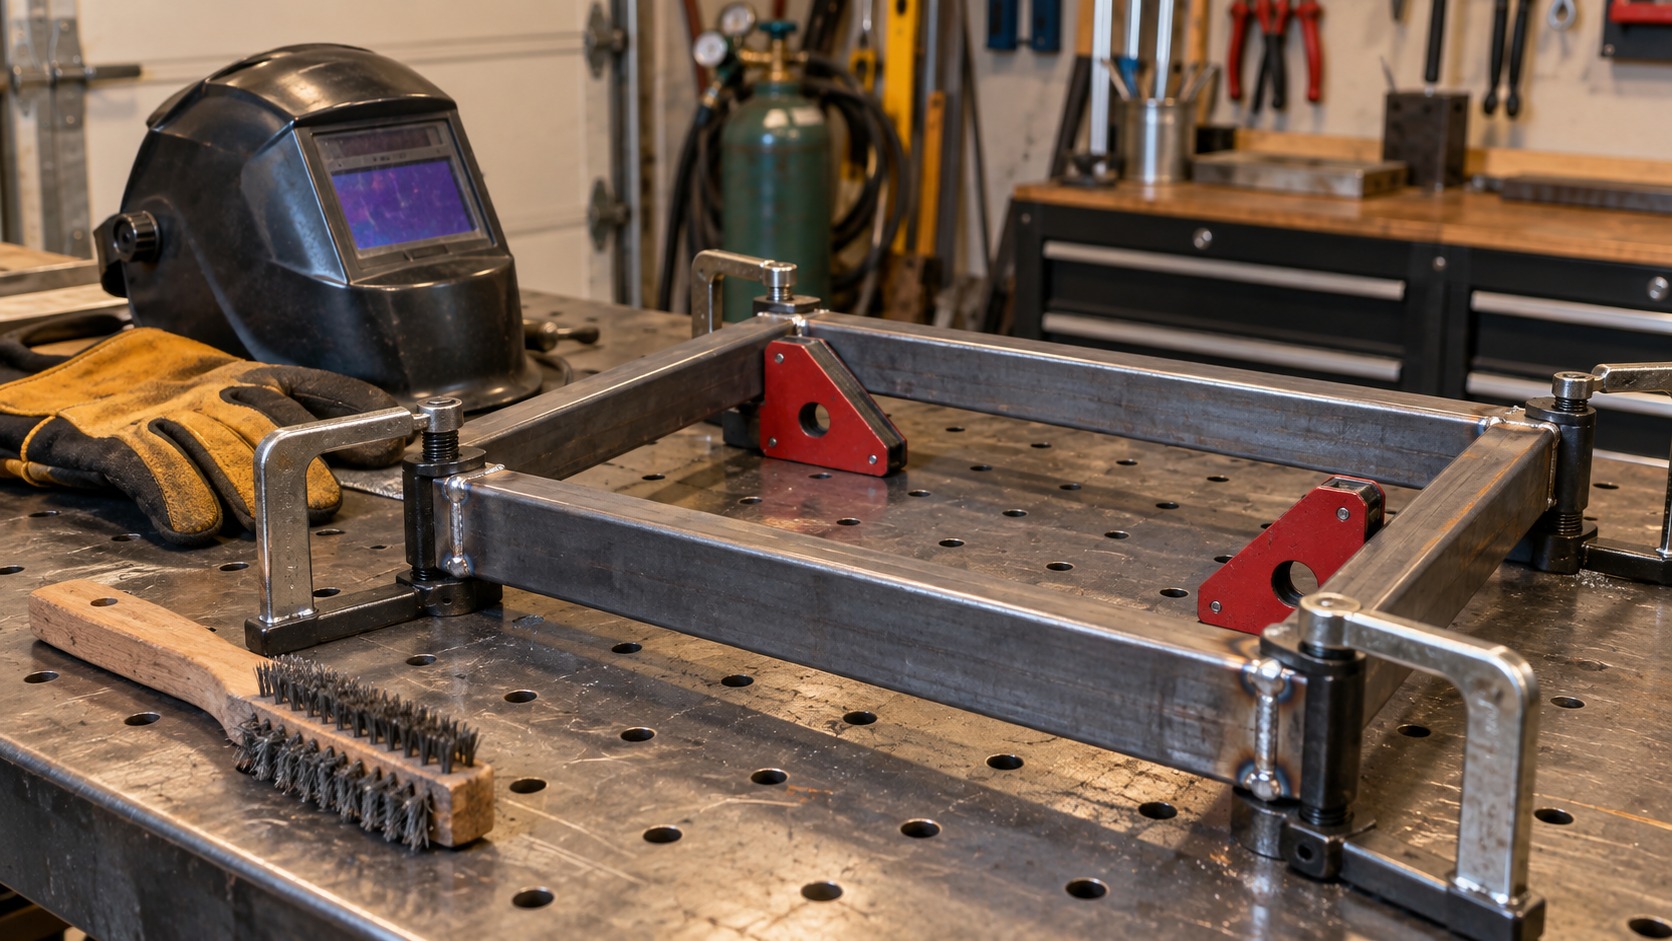
A plant stand is forgiving because it can be small, visible, and easy to test. Square tube or angle iron works well. The project teaches cutting matching legs, keeping a top frame flat, adding lower stretchers, and welding short beads without overheating one corner.
Before painting, set the frame on a flat surface and check for rocking. If one leg is short or the frame twisted, correct the metalwork before relying on rubber feet or a thick coat of paint. A plant stand should look simple, but it still rewards careful layout.
Make a Firewood Rack
A small firewood rack is a good outdoor beginner project because it uses simple rectangles and repeated welds. It also teaches why bracing matters. The rack does not need fine decorative welds, but it does need stable feet, square uprights, and enough stiffness to resist racking when loaded.
Keep the first version low and moderate in size. Heavy firewood can create more load than expected, especially if the rack is tall or moved while full. Add cross braces or gussets if the frame shifts side to side during testing. Paint or coat the rack after inspection so outdoor moisture does not attack the bare steel immediately.
Wait on Welding Carts Until Frames Are Square
A welding cart is tempting because every welder needs one, but it is a better second-stage project than a first bead project. A cart has wheels, a shelf, a cylinder location if shielding gas is used, cable storage, balance, and tipping concerns. Those details matter more than the beginner usually expects.
Build small cart accessories first: a lead hanger, clamp bracket, grinder rest, torch hook, or consumable tray. Once square frames and short fillet welds feel predictable, a simple cart becomes a reasonable project. Use proper cylinder restraint if a gas bottle is involved, and do not build a tall narrow cart that can tip easily.
Avoid Critical Repairs
Beginner welding should stay away from trailers, vehicle frames, suspension parts, hitches, ladders, lifting hooks, pressure vessels, propane tanks, structural beams, handrails over dangerous drops, and anything that could injure someone if the weld fails. These jobs require more than a bead that looks decent from the top.
The issue is not pride; it is consequence. A beginner can learn quickly and still lack knowledge about metallurgy, joint design, penetration, distortion, fatigue, and inspection. Practice on non-critical projects until a qualified welder, instructor, or inspector can help judge when the work is ready for higher-risk applications.
Control Heat in Short Sections
Heat moves metal. Long welds placed in one direction can pull frames out of square, warp flat bar, twist tubing, and make holes move out of alignment. Beginners often think the answer is a longer bead, but short controlled welds usually teach more and distort less.
Skip around the project. Weld a short section on one side, move to the opposite side, let the part cool, and check alignment. Clamps help, but clamps cannot erase all heat movement. Learning how a part pulls is one of the most useful lessons small projects can teach.
Learn What the Bead Is Telling You
A weld bead gives clues. Excess spatter may point to settings, stickout, polarity, dirty metal, or technique. Porosity may point to contamination, wind, gas coverage, or moisture. Undercut may mean too much heat, poor angle, or travel speed problems. A tall cold bead may not have fused properly.
Do not judge only by whether the weld is shiny or smooth. Brush it clean and inspect the edges where the weld meets the base metal. If the bead sits on top like a rope, the part may not be strong even if it looks tidy after grinding.
Grind Only for a Reason
Grinding can make a practice piece look better while removing evidence of what happened. On early projects, inspect before grinding. Check the toe of the weld, look for porosity, compare bead shape, and think about whether the joint needs to be flush or simply clean and safe.
When grinding is needed, avoid thinning the surrounding metal or cutting into the weld until it is weaker than before. Dress sharp edges, remove spatter, and smooth contact points, but leave functional welds alone when appearance is not the main requirement.
Use Clamps, Magnets, and Stops Carefully
Clamps and welding magnets make beginner projects easier, but they do not replace measuring. Magnets can hold parts slightly out of square if the cut ends are poor or if the joint has burrs. Clamps can pull tubing into a position that springs back when released.
Use fixtures as helpers, then verify with a square, tape, level, or diagonal measurement. For repeated projects like brackets or small frames, a simple stop block or jig can improve consistency. The point is repeatable setup, not forcing crooked material to behave for one photograph.
Choose Finishes After Testing
Paint and coating should come after welding, cleanup, and inspection. Bare steel rusts quickly, especially outdoors, but finishing too soon can hide flaws and make repairs messier. Wire brush, degrease, round sharp edges, and test the part before primer or paint goes on.
For outdoor pieces, use a finish intended for metal and give it time to cure. For shop fixtures, a simple coat of paint may be enough to slow rust and make the project easier to clean. Keep paint away from future weld areas unless it will be removed completely before welding again.
Keep a Small Welding Notebook
A welding notebook sounds formal, but it saves frustration. Record material thickness, process, wire or rod size, voltage, amperage, wire speed, polarity, shielding gas, and what the bead looked like. Add a quick note about travel speed, stickout, or electrode angle when something improves.
Photos help too. A picture of a good bead next to the settings is more useful than trying to remember what the dials said three weeks later. Over time, the notes become a personal starting chart for common shop projects.
Build a Skill Ladder
Move from coupons to hooks, from hooks to brackets, from brackets to small frames, and from frames to simple stands or racks. Each step should add one challenge, not five. New joint types, longer welds, thinner metal, tighter appearance, and load-bearing use should not all arrive in the same project.
If a project keeps going wrong, step back to a smaller version. Build one corner instead of the whole table. Weld one bracket instead of the full rack. The smaller version teaches the missing skill without wasting a full set of materials.
Know When to Ask for Instruction
Welding is easier to improve when someone experienced can watch your setup. A class, local welding shop, trade school, mentor, or qualified friend can often spot issues with angle, distance, settings, and preparation in a few minutes. That kind of feedback is hard to get from photos alone.
Ask for help before attempting projects where failure would matter. There is no shame in letting a professional handle structural, vehicle, pressure, or lifting work while you build skill on shop projects. Good judgment is part of welding skill.
Final Beginner Welding Project Review
The best beginner welding projects are small, inspectable, and useful. Practice coupons teach bead control. Hook racks and brackets teach layout and fillet welds. Plant stands, shelf frames, and firewood racks teach square assemblies, tacking, heat control, and finishing. Each project should make the next one easier to understand.
Keep the early work non-critical, clean the metal thoroughly, tack before welding fully, inspect before grinding, and write down the settings that worked. A beginner who builds that habit will progress faster than someone who jumps straight into risky repairs. The aim is not to make sparks today; it is to build control that can be trusted tomorrow.