Woodworking layout is the step that turns a plan into real marks on real boards. Beginners often want to hurry toward cutting, but the project usually succeeds or fails before the saw starts. A clear layout tells you where to cut, where to drill, which face shows, and which piece belongs where.
Good marking does not require fancy tools. It requires consistent references, readable lines, simple labels, and a habit of checking the mark before making it permanent. When the layout is clear, the cutting and assembly feel calmer.
A: Mark the face side and face edge before adding dimensions or cut lines.
A: Use pencil for rough layout, labels, waste marks, and marks that may change.
A: Use a knife for precise cuts, shoulders, joinery, and clean registration points.
A: Kerf is the material removed by the blade, and it must come from the waste side.
A: It is a scrap reference marked with repeated project dimensions.
A: Transferred marks make mating parts agree without repeating measurement errors.
A: Wrapped lines keep cuts, holes, and joints aligned across several faces.
A: Use centerlines, templates, pilot marks, and labels before drilling.
A: Remove visible marks after they are no longer needed for cutting or assembly.
A: Confirm references, waste sides, kerf, labels, hardware marks, and assembly order before cutting.
What Layout Means in Woodworking
Layout is the process of marking boards for cuts, holes, joints, hardware, curves, notches, and assembly. It includes measuring, squaring, labeling, transferring, and checking. The layout is the bridge between the plan and the tool.
A good layout reduces guessing. It shows the finished side, waste area, centerline, reference edge, and part orientation. A poor layout leaves you trying to remember what a pencil mark meant after the board has been moved three times.
Choose a Face Side and Face Edge
Start by choosing the best face and the best edge of the board. The face side is usually the side that will show or the side used as the main reference. The face edge is the edge most trusted for measuring and squaring.
Mark these lightly with a cabinetmaker’s triangle, small arrow, or simple note. Measuring related parts from the same face and edge keeps holes, joints, and reveals aligned. Random references create small differences that become visible during assembly.
Make Every Line Mean One Thing
A beginner mistake is making several pencil lines and hoping the correct one is obvious later. Each line should have a purpose. It might be a cut line, shoulder line, centerline, drill point, edge distance, or waste boundary.
Use short labels when needed. Write center, waste, hinge, shelf pin, front, back, top, or inside. These labels do not have to be pretty; they only have to prevent confusion before the part is cut or drilled.
Use Pencil Lines for General Layout
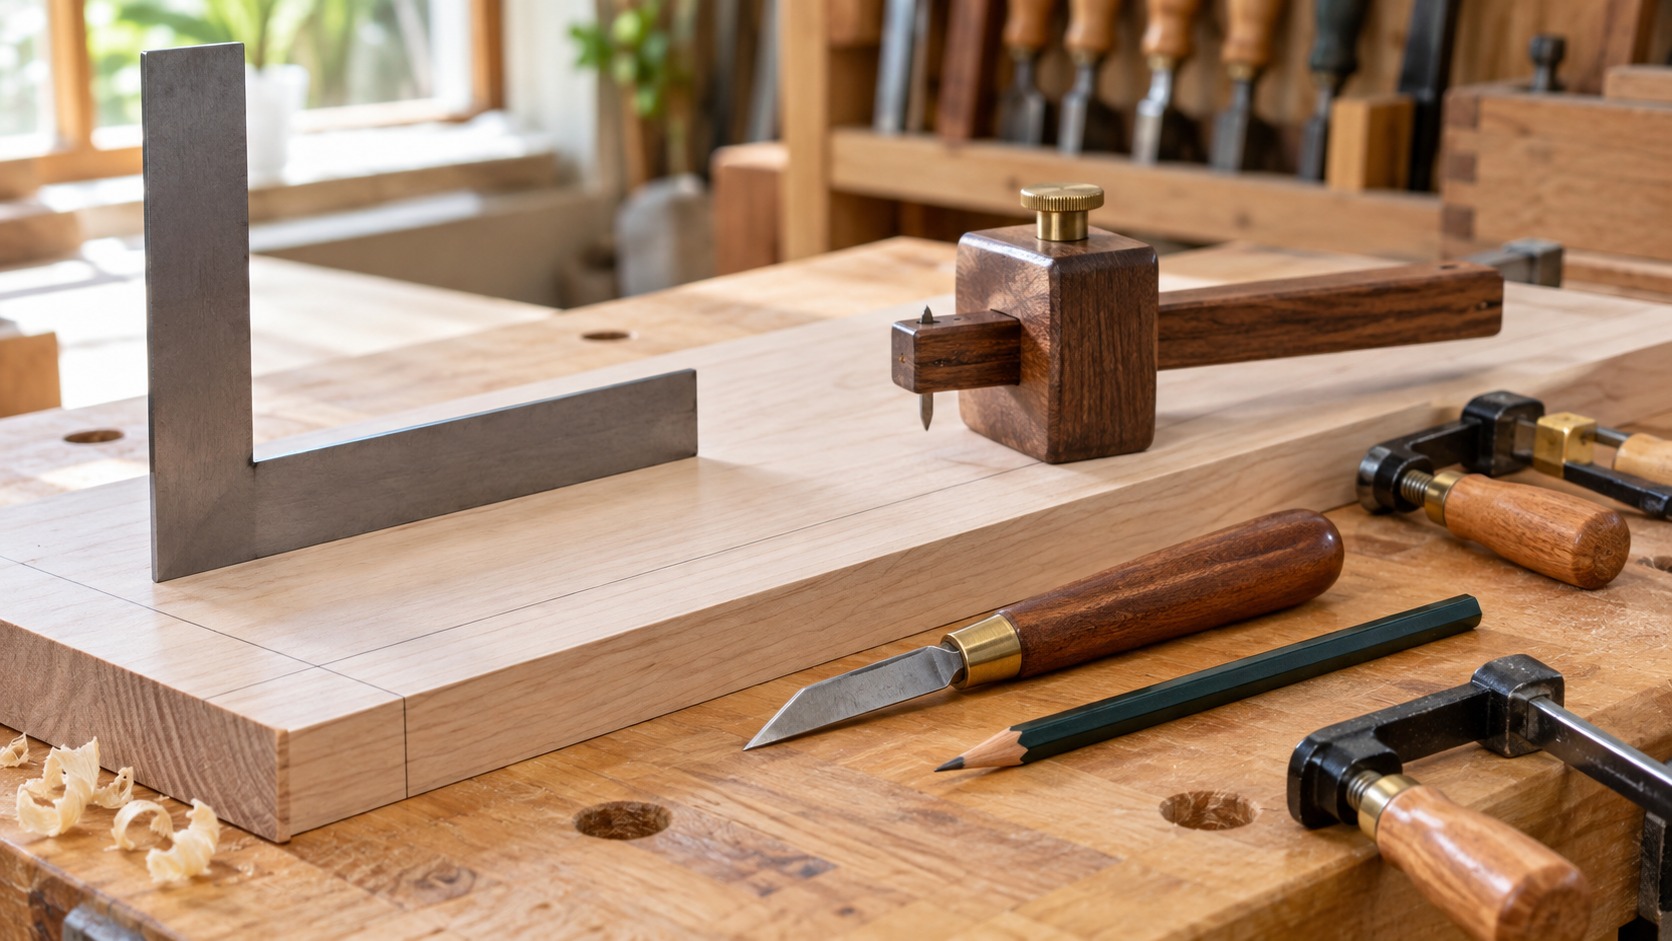
A sharp pencil is enough for many beginner projects. Shelves, benches, boxes, rough cuts, hardware locations, and general dimensions can all be laid out with a pencil and square. Keep the pencil sharp so the line does not become too wide.
Do not scribble over the same mark repeatedly. If the line is wrong, cross it out clearly and mark again. A fuzzy cluster of lines is almost as bad as no layout at all.
Use Knife Lines for Precise Work
A marking knife creates a crisp line for joinery, shoulders, hinges, and fine cuts. The knife line can guide a chisel or give a saw a small shoulder to start against. It is more precise than a pencil line because it has less width.
Knife lines are not needed for every beginner project, but they are useful when two parts must meet cleanly. Use light pressure at first and keep the knife against a square or straightedge.
Use a Square Correctly
A square only helps if it is seated against a reliable edge. Dust, rounded corners, splinters, or a bowed board can keep the square from sitting flat. Hold it firmly and check that it has not shifted before drawing the line.
Combination squares are especially useful for beginners because they can mark 90-degree lines, 45-degree lines, repeated offsets, and depth settings. Learn one square well before buying several layout tools.
Mark the Cutoff Clearly
Instead of relying on memory, show which part of the board will be removed. Use an X, hatching, or the word waste on the offcut side. This helps keep the saw blade on the correct side of the line.
This is especially important with repeated parts, angles, and boards that are flipped over. Many wrong cuts happen because the mark was accurate but the saw removed the wrong side.
Account for Saw Kerf
The saw blade removes material. That removed material is called kerf. If the blade cuts down the middle of the line, the finished part may be short. For accurate parts, the blade usually belongs on the waste side of the line.
Kerf matters when cutting several parts from one board. Leave space between parts or use a stop block so each piece comes out the same length. Do not mark parts end to end without accounting for the blade width.
Use Story Sticks for Repeated Marks
A story stick is a scrap strip marked with important layout locations. It can show shelf spacing, drawer heights, hook locations, rail positions, hole centers, or cabinet openings. It reduces repeated tape-measure work.
For beginners, story sticks are a quiet superpower. They prevent arithmetic mistakes and make matching pieces easier. Label the stick so it is not mistaken for scrap before the project is done.
Transfer Marks Instead of Re-Measuring
When two parts must match, direct transfer is often better than measuring both parts separately. Hold the pieces together, align the reference edges, and transfer the mark with a square or knife. This keeps paired parts consistent.
Direct transfer works well for hinges, shelves, trim returns, drawer fronts, and matching rails. Measuring each part from scratch invites tiny differences that may show later.
Wrap Lines Around a Board
Some marks need to continue around two or more faces of a board. Use a square from the same reference face and edge so the lines meet. This helps with notches, posts, legs, joinery, and cuts that must be visible from multiple angles.
If the lines do not meet, stop and find out why. The board may be out of square, the square may have slipped, or the reference may have changed.
Mark Centerlines for Hardware
Centerlines are useful for handles, hinges, brackets, legs, drawer pulls, shelf pins, and holes. A centerline gives hardware a clear visual reference and makes it easier to repeat the same placement on matching parts.
Do not erase centerlines too early. They can help during dry fitting and hardware installation. Place them where they will be hidden or easy to sand away after the work is complete.
Label Parts Before Cutting
As soon as several pieces are cut, they can become confusing. Label parts as left, right, top, bottom, front, back, inside, outside, long rail, short rail, or shelf support. Mark lightly on hidden faces.
Labels are especially helpful when grain direction, best face, or hardware placement matters. A simple label prevents a good part from being installed backward.
Keep Layout Marks Organized
A busy board can become hard to read. Use different mark styles for different meanings. A single line can be a cut line, a cross can be a drill point, hatching can mean waste, and arrows can show face direction.
If a mark is wrong, cross it out clearly. Do not leave abandoned marks that look active. Clean layout is easier to trust when the tool is in your hand.
Use Tape for Rough, Rules for Fine
A tape measure is excellent for larger parts, room measurements, and rough sizing. A steel rule, combination square, or marking gauge can be better for small offsets and fine work. The tool should match the scale of the job.
Trying to mark a tiny hinge setback with a floppy tape can create errors. Trying to measure a room with a six-inch rule is just as awkward. Use the tool that gives the clearest reference.
Check Layout Against the Actual Project
Before cutting, compare the marks to the project. Does the shelf support land on the inside face? Are the hinge marks on the correct edge? Is the best face still outward? Is the waste side obvious?
This quick review catches many beginner mistakes. It is easier to fix a pencil mark than to remake a board.
Dry Fit With the Marks Visible
When possible, dry fit parts while the layout marks are still visible. This lets you check orientation, reveal lines, hardware locations, and matching parts before sanding everything away.
If the project looks wrong during dry fit, the layout may show why. A reversed part, wrong reference edge, or shifted mark is easier to diagnose while the evidence is still on the wood.
Practice on Scrap
Layout skills improve quickly with practice. Use scrap to practice square lines, knife lines, center marks, story sticks, and transferred marks. Cut beside the line and see whether the finished piece matches the plan.
Scrap practice also teaches how wide pencil lines are, how saw kerf changes length, and how easily a square can shift. Those lessons are cheap on scrap and expensive on finished parts.
Use Layout to Plan Assembly Order
Layout is not only for cutting. It can also show which parts should be assembled first. Mark where clamps need access, where screws will enter, which side gets glue, and which faces must stay clean.
Assembly marks are helpful on boxes, frames, benches, shelves, and cabinets. They keep the project from becoming a puzzle after the parts are cut. A few arrows and labels can prevent gluing a part in upside down.
Mark Hardware Before Finish
Hardware layout should happen before paint, stain, or clear finish whenever possible. Hinges, pulls, brackets, and shelf pins often need pilot holes, centerlines, or test fitting. Drilling after finishing increases the risk of scratches and chips.
Do not install every piece of hardware permanently too early, but confirm the locations. A small pilot hole or light center mark can make final installation easier after the finish cures.
Use Templates for Repeated Hardware
A template helps repeat the same hole pattern on several parts. Cabinet pulls, hinges, shelf pins, hooks, and brackets are all easier with a simple jig or scrap template. The template only needs to be accurate and clearly oriented.
Mark top, bottom, front, and back on the template. Test it on scrap before using it on the project. A template used backward can repeat the same mistake very efficiently.
Keep Measuring Notes With the Project
Beginners often write a measurement on a scrap, then lose it under offcuts. Keep critical measurements in one place: a notebook, project sheet, story stick, or tape on the bench. Include shelf spacing, final lengths, offsets, hardware setbacks, and tool settings.
Good notes are especially useful when the project takes more than one day. They let you return to the work without rebuilding the plan from memory.
Know When to Remove Marks
Some marks should stay until assembly is complete. Others should be removed before finishing because pencil and knife lines can show under stain or clear coat. Decide which marks are still needed before sanding them away.
Use light marks on visible faces and stronger marks on hidden faces. If the wood will be stained, test whether pencil marks erase cleanly. Layout should guide the work without becoming part of the finished surface.
Slow Down at Transitions
Most layout mistakes happen when switching tasks: measuring to cutting, cutting to drilling, drilling to assembly, or assembly to finishing. Pause at each transition and ask whether the marks still make sense.
This pause does not need to be dramatic. Check the reference edge, waste side, orientation, and next tool. A ten-second review can save a board, a hinge location, or a visible face.
Build a Personal Marking System
Over time, use the same symbols on every project. An X can mean cutoff, arrows can show grain or face direction, triangles can match parts, and circles can mark drill points. A consistent system is easier to read under pressure.
The marks only need to make sense to the person building the project. Consistency is what matters. When the system is familiar, layout becomes faster without becoming sloppy.
Final Layout and Marking Review
Good woodworking layout starts with a reliable face, edge, and reference. Use clear lines, mark the cutoff side, account for kerf, label parts, transfer repeated marks, and keep every layout mark readable until it is no longer needed.
Beginners get better results when they make the board explain the plan. If the marks are clear, the cut, drill, and assembly steps become easier to trust.