Changing an HVAC air filter is one of the easiest maintenance jobs in the house, but it still deserves a careful routine. A filter that is backward, undersized, too restrictive, crushed into the rack, or forgotten behind a second return grille can reduce airflow and let dust reach parts of the system that are much harder to clean.
The right filter change is part replacement and part inspection. Find every filter location, confirm the size and airflow direction, look at what the old filter collected, install the new one without gaps, and then listen to how the system runs afterward. That simple habit protects comfort, equipment life, and indoor air quality better than guessing from the calendar alone.
A: Check return grilles, the furnace or air-handler cabinet, and any service label showing filter access.
A: Yes. Shutting it off keeps loose dust from being pulled in while the slot is open.
A: Point the arrow with the airflow toward the blower, furnace, or air handler.
A: Only if the system can handle the added resistance without reducing airflow.
A: Check for the wrong thickness, a bent rack, a swollen frame, or a forced installation.
A: It usually means moisture, drainage, humidity, or coil icing needs attention before normal use continues.
A: Base the schedule on filter type, runtime, pets, dust, smoke, season, and remodeling.
A: Yes. Install the right filter and consider service if dust may have reached internal parts.
A: Do not double-filter unless an HVAC professional confirms the system can handle it.
A: Confirm size, arrow direction, flat seating, closed access panel, written date, and normal sound after restart.
Find Every Filter in the System
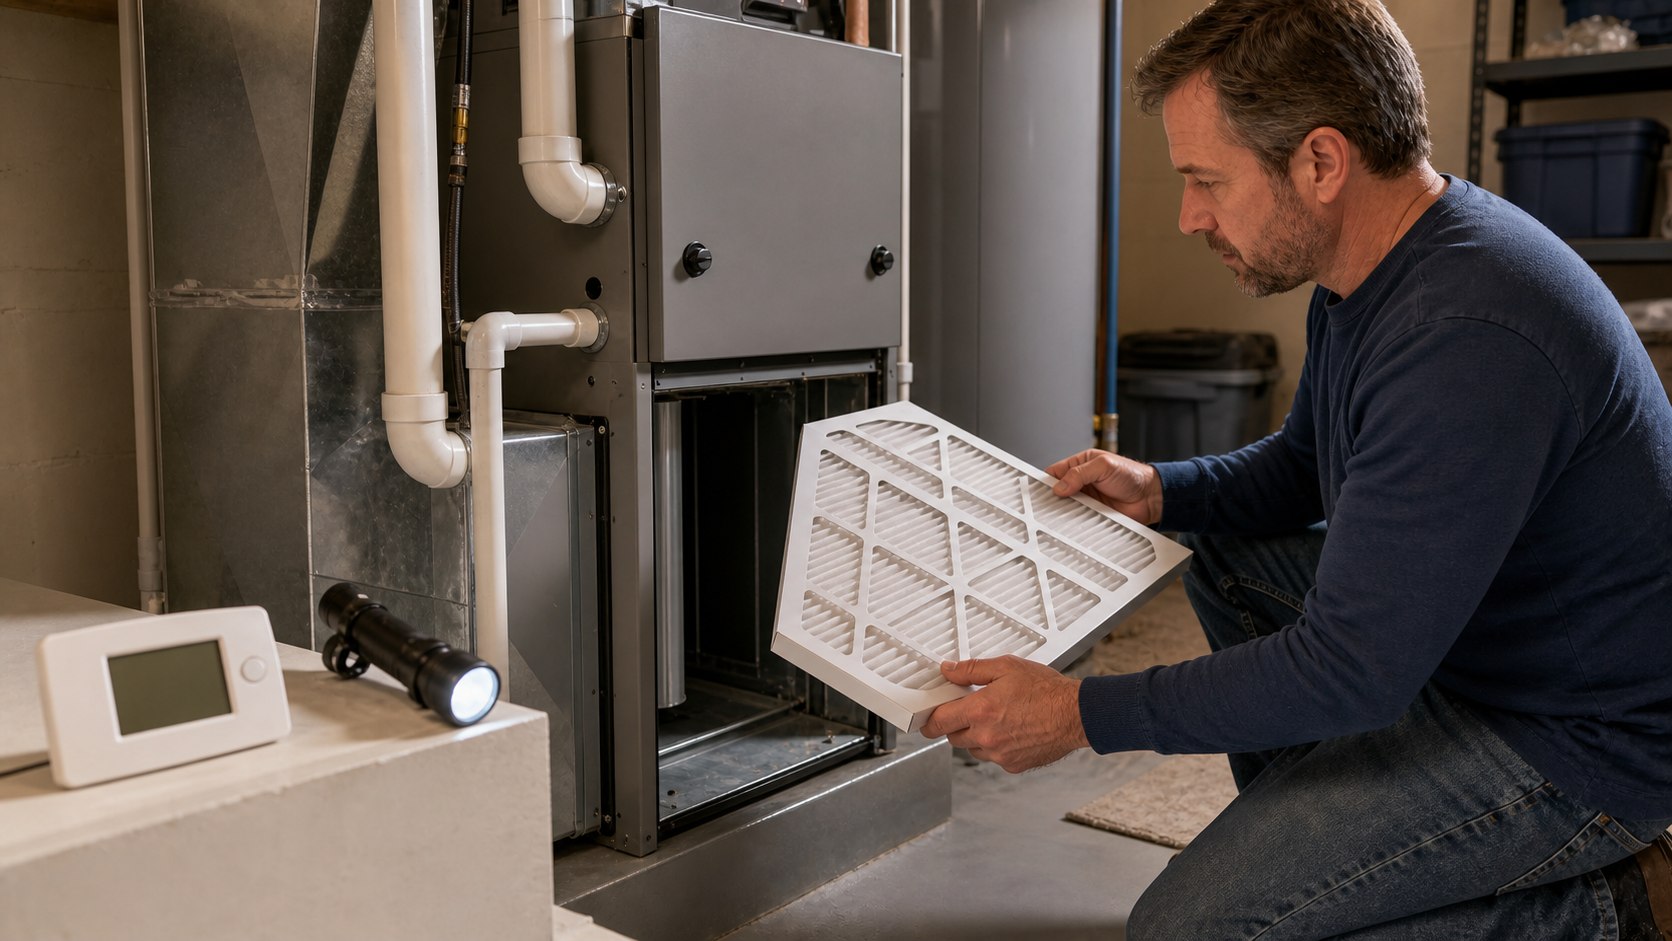
Some homes have one filter at a return grille in a hallway. Others have a filter cabinet at the furnace or air handler. Larger homes, additions, finished basements, and zoned systems may have more than one return filter. Before replacing anything, walk the house and identify every return grille, equipment cabinet, and labeled filter slot.
Do not assume the first filter you find is the only one. A clean filter at the furnace will not help if a second return filter upstairs is packed with dust. Take photos of each location, write down the size, and note whether the filter is in a ceiling grille, wall grille, floor return, or equipment cabinet. That map keeps future maintenance from becoming a scavenger hunt.
Turn the System Off
Set the thermostat to off before pulling the filter. This keeps the blower from drawing loose dust into the cabinet while the filter slot is open. It also prevents suction from grabbing the old filter, bending the frame, or scattering debris as you remove it.
For a routine filter change, you usually do not need to shut off power at the breaker. Stay in the filter area only. If a filter is hidden behind panels that expose wiring, burners, blower parts, or anything that feels outside normal maintenance access, stop and check the equipment manual or schedule service.
Confirm the Printed Size
Most filters have a nominal size printed on the frame, such as 16 by 20 by 1. That number is usually close to the size you buy, but it may not match the exact measured dimensions. If the old filter fit well, the printed size is a useful shopping guide. If it was bent, loose, crushed, or surrounded by dust tracks, measure the slot and verify the correct size.
Thickness matters as much as length and width. A one-inch filter rack cannot accept a thicker media filter unless the cabinet is designed for it. A filter that is too thin may rattle or leave bypass gaps. A filter that is too thick may prevent the grille or cabinet door from closing, which can pull unfiltered air around the frame.
Choose Filtration the System Can Handle
A higher-rated filter can capture smaller particles, but better capture is not helpful if the filter is too restrictive for the system. Dense filters can reduce airflow through older equipment, undersized returns, weak blower setups, or duct systems that were already borderline. The best filter is compatible with the equipment and the home, not simply the highest number on the shelf.
If the system has been comfortable with a midrange pleated filter, jumping to a very restrictive filter should be done carefully. After installing it, listen for whistling, check whether vents feel weaker, and notice whether the system runs longer than usual. If airflow drops immediately, go back to a less restrictive option and ask an HVAC technician what the system can support.
Read the Old Filter Before Tossing It
The old filter is a small report on what the system has been breathing. A light gray surface after a normal interval may be expected. Thick dust, pet hair mats, drywall powder, soot-like residue, moisture, oily dirt, or a collapsed filter tells a more specific story. Look at both sides before throwing it away.
Heavy loading means the replacement schedule may be too long or the house has an unusual dust source. A collapsed filter can mean the filter was clogged, too restrictive, or poorly supported. A clean-looking filter after months of use may mean air is bypassing it. The point is not to judge the filter by age alone; judge it by condition and fit.
Remove the Filter Without Releasing Dust
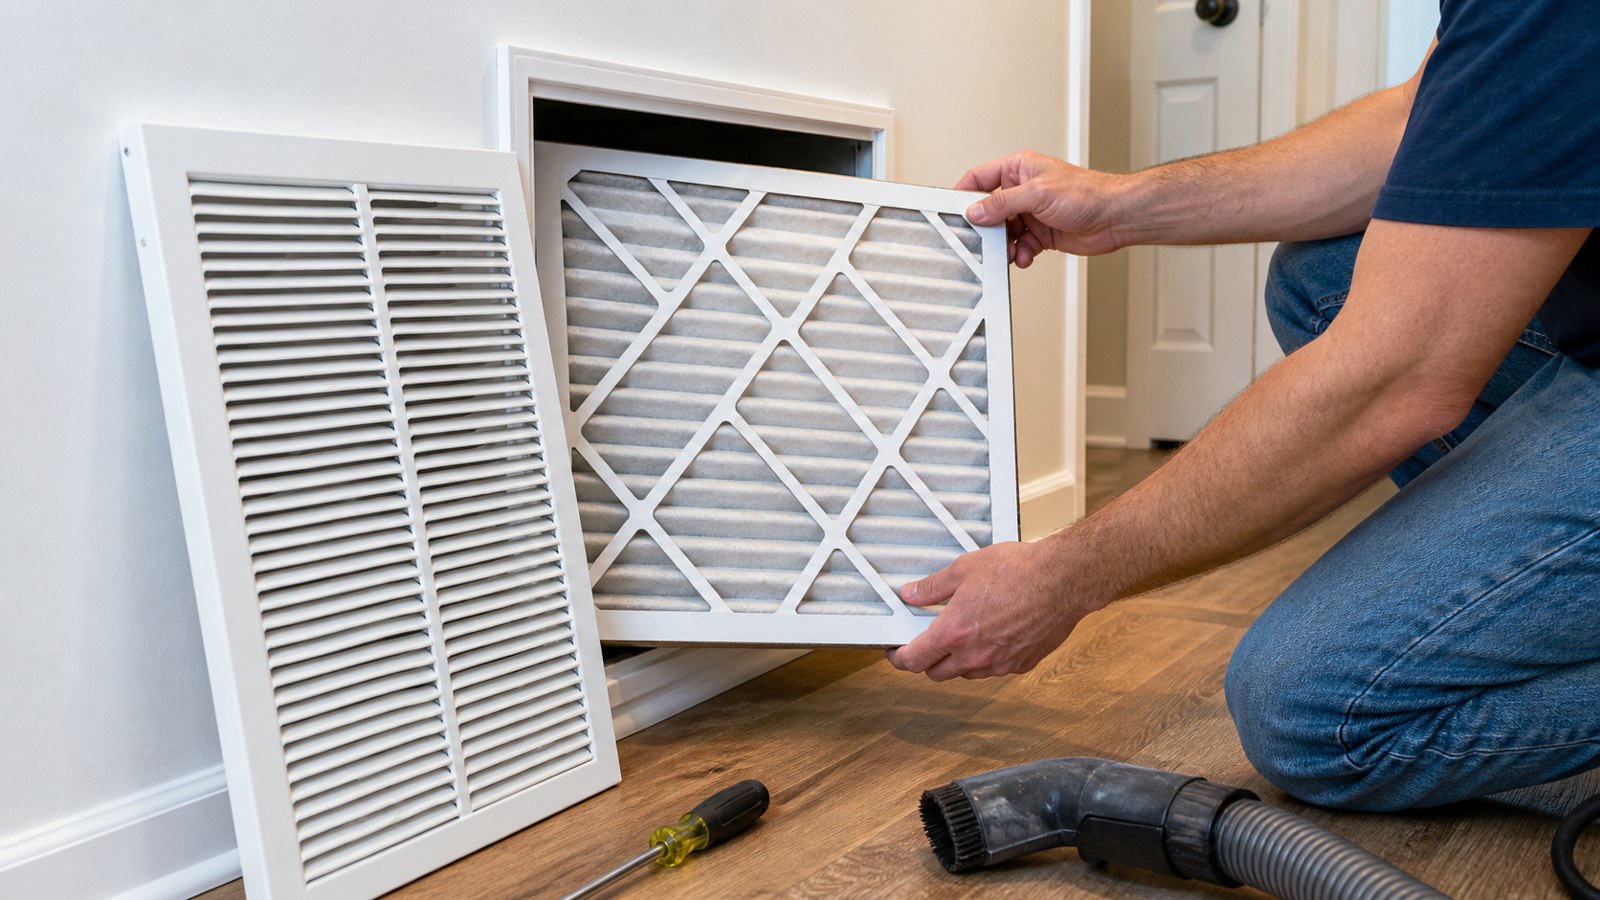
Slide the old filter out slowly and keep the dirty side from brushing the grille, cabinet edge, or wall. If it is heavily loaded, place it directly into a trash bag. Do not shake it indoors, because that only puts captured particles back into the room.
Ceiling return filters deserve extra care. Stand on a stable ladder, support the grille with one hand, and keep your face out from under the falling dust path. If the filter bends as it comes out, move slowly rather than tearing it across the grille frame. A little patience keeps the job cleaner.
Clean the Filter Area
Before installing the new filter, wipe loose dust from the return grille, filter track, gasket area, and cabinet edge. A vacuum with a brush attachment can help at the grille. The goal is to keep debris from blocking the new filter or being pulled past it during startup.
Do not push dust deeper into the blower cabinet. If the area beyond the filter is heavily dirty, that may mean filters have been missing, loose, backward, or bypassed for a long time. At that point, a professional cleaning may matter more than another quick filter swap.
Follow the Airflow Arrow
Most disposable filters have an arrow on the frame. That arrow should point with the direction of airflow, toward the equipment. At a return grille, the arrow usually points into the duct. At a furnace or air-handler cabinet, it usually points toward the blower, coil, or furnace body.
If the direction is confusing, look at the old filter. The dirtier side normally faces incoming air. You can also feel which side pulls air when the system runs, then turn it off before installing the new filter. Once you are sure, mark the filter rack or grille with a small airflow arrow so the next change is obvious.
Seat the Filter Without Gaps
The filter should sit flat in the rack or grille. It should not bow, fold, pinch, sag, or leave a corner open. Air follows the easiest path, and a small gap beside the filter lets dust bypass the media entirely. A crooked filter can make a clean replacement almost useless.
If the slot is awkward, use both hands and guide the frame slowly. Do not crush the cardboard just to make it fit. A crushed frame may look installed from the outside while leaving a hidden opening along the edge. If the filter never sits correctly, the rack may need repair, weatherstripping, a cabinet cover, or a different filter size.
Close the Grille or Cabinet Completely
After the new filter is seated, close the grille, latch, or cabinet door fully. Some systems depend on that cover to seal the return side. A loose access panel can whistle, pull dusty air around the filter, or keep a safety switch from closing.
Look around the return area too. Furniture, curtains, rugs, storage bins, and pet beds can block airflow before it even reaches the filter. A new filter behind a blocked return does not solve the airflow problem. Give return grilles open space so the system can breathe without strain.
Write the Date Where It Helps
Write the install date on the filter frame before sliding it in, or keep a simple note in your phone. A reminder on the calendar is useful, but the written date on the filter is the record anyone can see during the next change. It prevents arguments with memory.
Include the size and filter type in your note if there are multiple filters in the home. A house with two returns may use different sizes, and mixing them up can lead to a loose fit or a wasted store trip. A tiny maintenance note saves time every season.
Restart and Listen
Turn the thermostat back on and listen. Normal airflow should sound familiar. New whistling, rattling, panel vibration, or a grille that seems to pull unusually hard may mean the filter is not seated correctly, the cover is loose, or the replacement is too restrictive.
Check a few supply vents after the system has run briefly. If airflow feels weaker right after a filter change, do not assume the equipment suddenly failed. Recheck size, direction, fit, filter rating, and cabinet closure first. The newest change is often the most likely cause.
Set the Replacement Schedule by Conditions
The common one-to-three-month rule is only a starting point. Pets, high fan runtime, dusty roads, wildfire smoke, remodeling, heavy cooking, candles, open windows, and the filter type all change how quickly a filter loads. A vacation home may need less frequent changes than a busy home with pets and constant blower use.
After installing a new filter, check it after thirty days. If it is already dark and packed, shorten the schedule. If it still looks clean and airflow is normal, the interval may be longer. The filter condition should teach the schedule instead of the package making every decision.
Handle Pet Homes Differently
Pet hair can mat across the filter face and reduce airflow before fine dust becomes the issue. Homes with shedding pets may need more frequent filter checks, especially during seasonal shedding or when pets spend time near return grilles. Hair around the grille is a sign the filter may be loading quickly.
Vacuuming return grilles and nearby floors helps, but it does not replace filter checks. If pet hair appears inside the filter cabinet or past the filter, look for bypass gaps. The filter should catch debris before it reaches the blower or coil.
Take Remodel Dust Seriously
Drywall sanding, sawdust, tile cutting, floor refinishing, and demolition can load a filter much faster than normal living. During messy work, check the filter frequently and avoid running the HVAC system when dust is being created if the project allows it. Fine construction dust can pass through gaps and settle where it does not belong.
After a renovation, replace the filter and inspect the return area. If dust made it past the filter, the system may need cleaning. A filter change is cheap; a dirty blower wheel or coil is not. Construction dust is one of the times when “I just changed it recently” may not mean much.
Know What a Wet Filter Means
A wet filter is not normal. Moisture can come from a frozen evaporator coil thawing, a condensate drain problem, a humidifier leak, water intrusion near a return, or a filter location exposed to damp conditions. Replace the wet filter, but do not treat replacement as the full repair.
Moisture can make the filter collapse, restrict airflow, grow odors, or shed material into the system. If the new filter becomes damp again, stop and investigate the source. Repeated wet filters point to a system or moisture issue that deserves service.
Respond to a Missing Filter
If you open a return grille or cabinet and find no filter, pause before sliding in the first size that seems close. Some systems filter at the equipment, not the grille. Others have a filter cabinet that a previous homeowner forgot about. Confirm the intended filter location so you do not accidentally double-filter or leave the real slot empty.
If the system has truly been running without a filter, inspect gently for dust in the accessible return area and around the equipment. Do not disassemble the blower compartment casually. If buildup is visible past the filter location, schedule service so sensitive parts can be checked and cleaned properly.
Do Not Double-Filter Without Approval
Using a return grille filter and a furnace cabinet filter at the same time can restrict airflow if the system was designed for only one filter location. More filters do not automatically mean better filtration. They can make the blower work harder and reduce comfort if the return side becomes too restrictive.
If you discover filters in two places, check the equipment documentation or ask an HVAC technician whether both are intended. Some systems are designed with multiple filter locations, but many are not. The goal is clean air moving freely, not layers of filtration that starve the equipment.
Keep the Filter Rack in Good Shape
Look at the rack each time you change the filter. Bent rails, missing covers, torn gaskets, loose grille clips, and gaps around the filter slot let air bypass the media. A perfect filter cannot do its job if the rack does not hold it in the airstream.
Small air leaks around a filter cabinet may be improved with proper gasket material or a better-fitting cover, but do not tape over panels that need service access. If the filter slot looks homemade, damaged, or impossible to seal, an HVAC technician can often improve the rack during routine service.
Connect Filter Changes to System Symptoms
A dirty or restrictive filter can contribute to weak airflow, long run times, uneven rooms, frozen coils, furnace overheating, dusty ducts, and higher energy use. It is not the cause of every HVAC problem, but it is one of the first things to check because it is visible and inexpensive.
Keep notes when symptoms appear. If a new filter improves airflow or reduces noise, the old one was part of the problem. If nothing changes, the issue may involve duct design, blower performance, refrigerant charge, coil cleanliness, dampers, returns, or equipment sizing. The filter check clears one variable from the list.
Build a Simple Filter Routine
Store a few correct filters in a dry, clean place, and write the location and size on the package if your home uses more than one size. Do not crush stored filters under tools or boxes. A bent filter frame can create the same bypass problem as a poor installation.
Make filter changes part of a larger seasonal check: look at return grilles, listen to the blower, confirm vents are open, check for wet filters, and note anything unusual. The job still takes only a few minutes, but it becomes a useful snapshot of how the HVAC system is living in the house.