The Rise of the Epoxy River Table
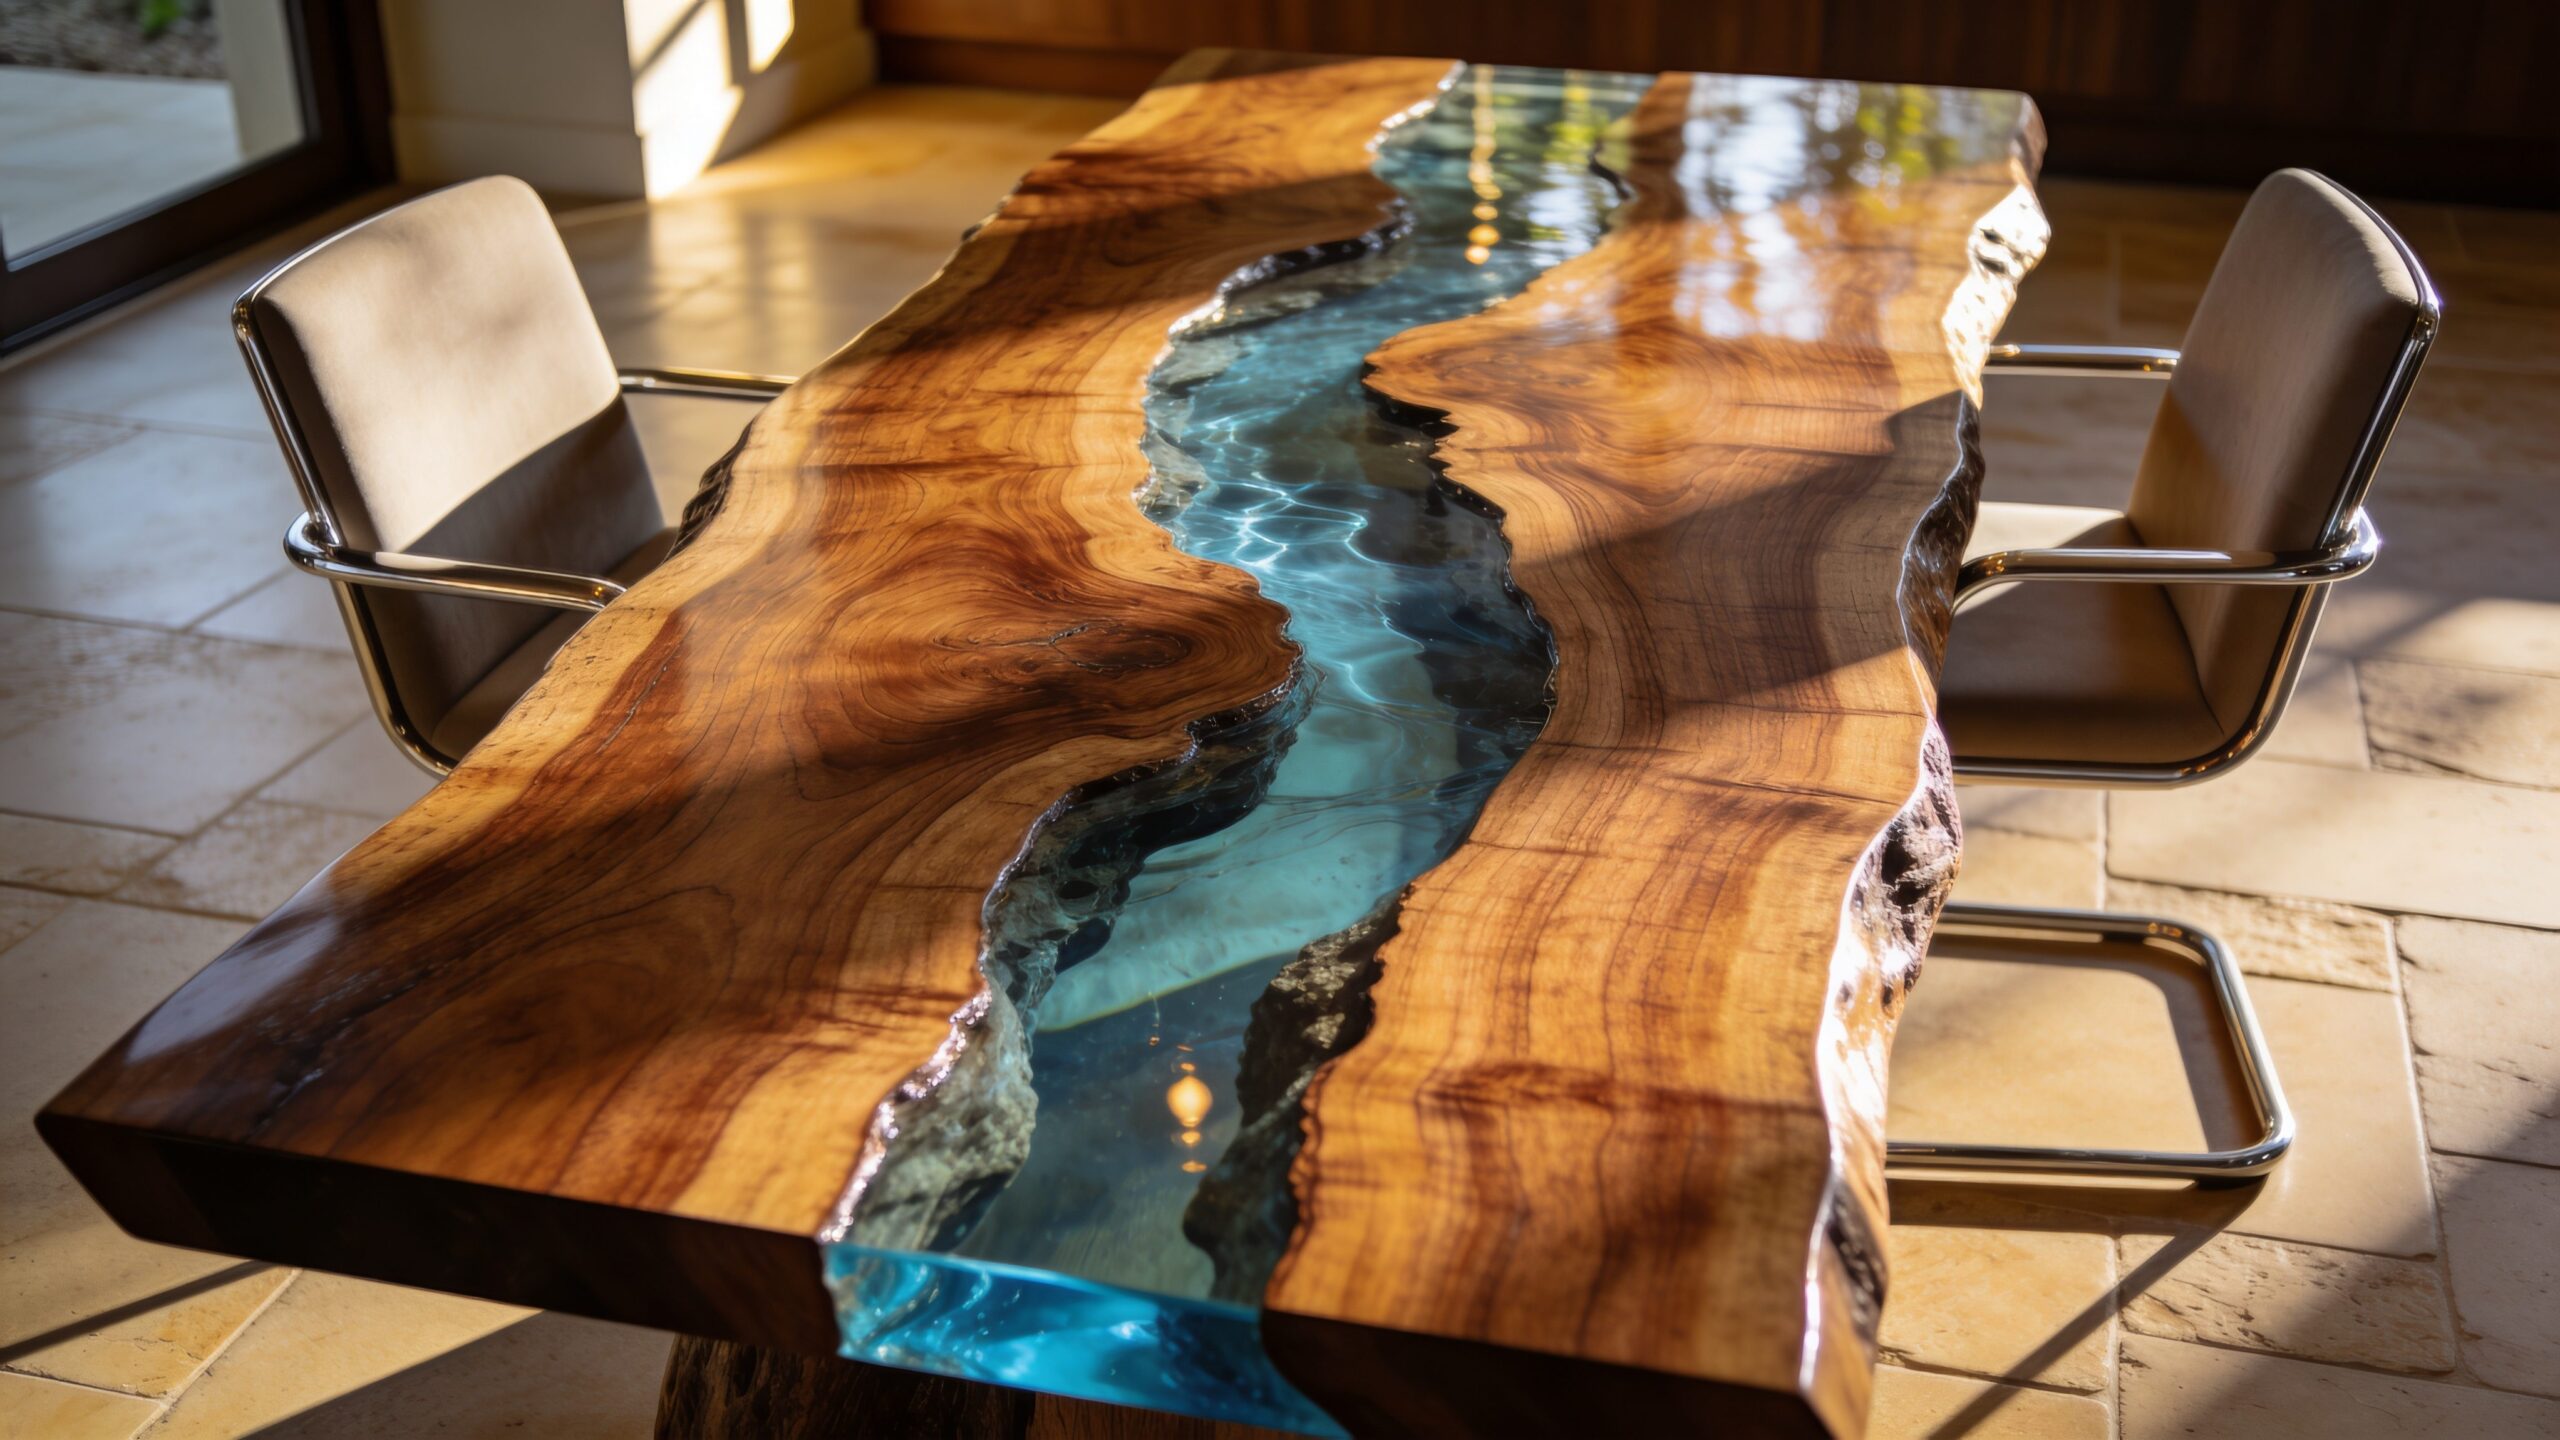
Epoxy river tables have become one of the most striking trends in modern furniture design, blending organic beauty with sleek contemporary aesthetics. These tables take natural live-edge wood slabs and transform them into functional art pieces by filling the voids with crystal-clear or colored epoxy resin. The result is a stunning contrast between rugged wood grain and glass-like resin that mimics flowing water, molten stone, or even abstract art. What makes epoxy river tables so compelling is their uniqueness. No two slabs are identical, and each resin pour creates patterns that can never be perfectly replicated. This makes every table a one-of-a-kind centerpiece, whether placed in a dining room, office, or living space. For makers, the process is just as rewarding as the final product, combining woodworking, chemistry, and creative design into a single build.
A: Yes with proper ventilation and protection.
A: Typically 24–72 hours.
A: Yes with patience and preparation.
A: Air trapped in wood or mixing process.
A: Walnut, maple, and oak are popular.
A: Yes, sanding and re-pouring helps.
A: Follow manufacturer guidelines.
A: Basic woodworking tools are enough.
A: Sand and polish thoroughly.
A: Yes, once fully cured.
Understanding the Core Materials
At the heart of every epoxy river table are two essential elements: wood and resin. The wood is typically a live-edge slab, meaning it retains the natural contours of the tree’s outer edge. Popular choices include walnut, maple, oak, and acacia due to their durability and visually rich grain patterns. The slab selection is critical, as cracks, voids, and natural edges define the character of the finished piece.
Epoxy resin, on the other hand, is a two-part liquid system that cures into a hard, glossy surface. When mixed correctly, it flows into gaps between slabs and hardens into a durable, glass-like material. Resin can be left clear for a natural water effect or tinted with pigments to create bold, dramatic designs. Understanding how these two materials interact is the foundation of building a successful epoxy river table.
Choosing the Perfect Slab
Selecting the right slab is one of the most important decisions in the entire process. The wood should be properly dried, ideally kiln-dried, to prevent movement or cracking after the table is completed. Moisture content that is too high can lead to warping, bubbles, or adhesion issues with the resin. Beyond technical considerations, the slab’s visual appeal plays a major role. Look for interesting grain patterns, natural curves, and unique imperfections that can enhance the final design. The shape of the slab will determine the flow of the “river,” so pieces with irregular edges often produce the most visually dynamic results.
Preparing the Wood for Resin
Before any resin is poured, the wood must be carefully prepared. This involves flattening the slab, removing bark, sanding rough surfaces, and sealing porous areas. Proper preparation ensures that the resin bonds well and prevents unwanted air bubbles from forming during the pour.
Sealing is particularly important. Applying a thin coat of epoxy to the wood before the main pour helps lock in air and moisture, reducing the risk of bubbles rising to the surface. This step may seem minor, but it significantly improves the clarity and finish of the final table.
Building the Mold
The mold is what contains the liquid resin during the pour, and it must be both sturdy and leak-proof. Typically constructed from melamine boards or sealed plywood, the mold is designed to match the desired dimensions of the table. Every seam must be sealed with silicone or specialized tape to prevent resin from escaping. A well-built mold not only holds the resin in place but also ensures that the table cures evenly. Any imperfections in the mold can transfer to the final product, so precision at this stage is essential. Once the slabs are positioned inside the mold, they are secured to prevent shifting during the pour.
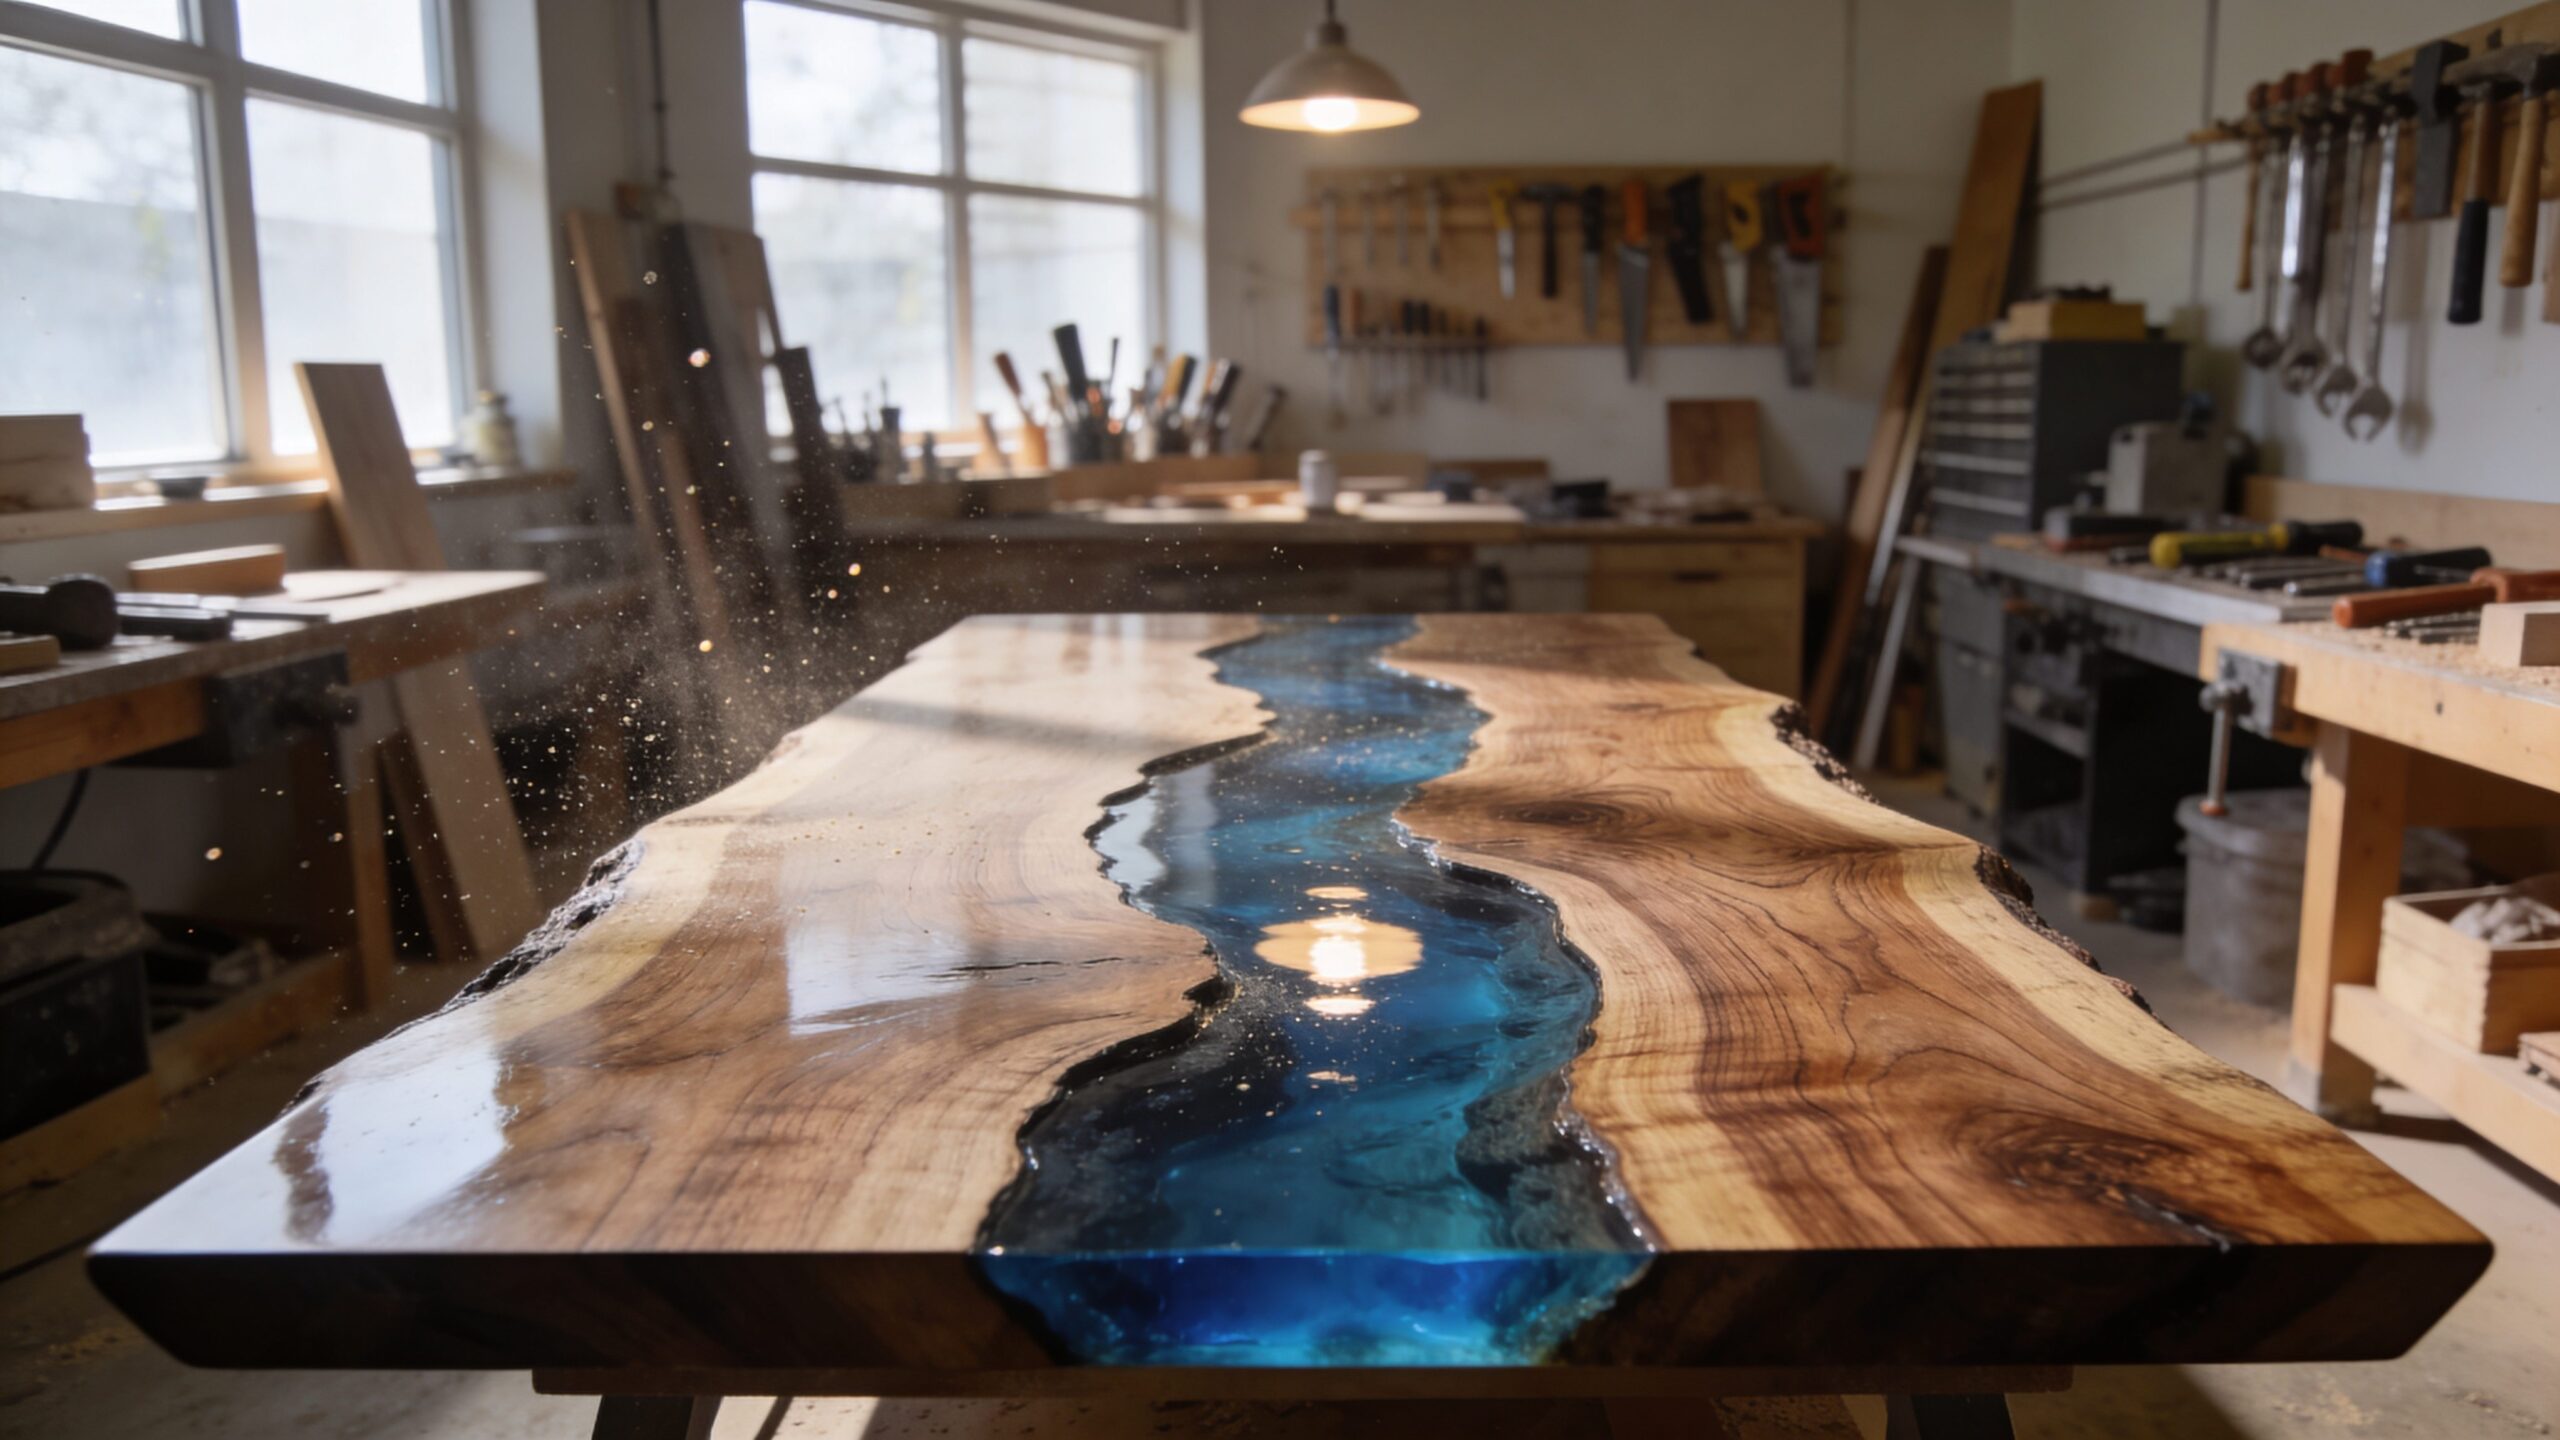
Mixing and Pouring the Resin
Mixing epoxy resin is both a science and an art. The ratio of resin to hardener must be exact, and the mixture must be thoroughly combined to ensure proper curing. Temperature also plays a critical role, as resin behaves differently depending on the environment.
When pouring, the resin is typically added in layers to prevent overheating and cracking. Deep pours generate heat as they cure, so controlling thickness is key to avoiding defects. Pigments or dyes can be added during this stage to create stunning visual effects, from translucent blues that mimic water to metallic swirls that resemble molten metal.
Eliminating Bubbles and Imperfections
Air bubbles are one of the most common challenges in epoxy work. They can form during mixing or rise from the wood as the resin cures. To combat this, builders often use heat guns or torches to gently pass over the surface, allowing bubbles to escape. Patience is essential here. Rushing the process can lead to uneven surfaces or trapped air pockets. By carefully monitoring the resin during the curing phase, builders can achieve a crystal-clear finish that enhances the depth and beauty of the table.
Curing and Demolding
Once the resin is poured, the table must be left to cure undisturbed. Depending on the type of epoxy used, this can take anywhere from 24 hours to several days. During this time, maintaining a stable temperature is crucial to ensure a consistent cure.
After curing, the table is removed from the mold. This moment is often one of the most satisfying parts of the process, as the raw materials finally reveal their transformed state. However, the table is not yet complete—further refinement is needed to achieve a professional finish.
Sanding, Finishing, and Polishing
The cured table typically requires extensive sanding to remove imperfections and achieve a smooth surface. This process starts with coarse sandpaper and gradually progresses to finer grits, eventually preparing the surface for polishing. Finishing options vary depending on the desired look. Some builders apply oil finishes to enhance the wood’s natural beauty, while others use additional epoxy coats for a high-gloss appearance. Polishing compounds can then be used to bring the resin to a mirror-like shine, creating the signature look of a high-end river table.
Adding Legs and Final Assembly
The final step in the build is attaching the table legs or base. Options range from minimalist metal frames to custom wooden bases that complement the slab. The choice of base can dramatically influence the overall aesthetic, turning the table into a modern statement piece or a rustic centerpiece.
Proper alignment and secure attachment are essential to ensure stability. Once assembled, the table is ready to take its place as a functional work of art.
Design Variations and Creative Possibilities
One of the most exciting aspects of epoxy river tables is the endless range of design possibilities. Builders can experiment with colors, embedded objects, and layered effects to create truly unique pieces. Some designs incorporate stones, glass, or even LED lighting to enhance the visual impact. The “river” itself can take many forms, from straight and symmetrical to wildly organic. This flexibility allows each builder to develop their own style, pushing the boundaries of what resin furniture can achieve.
Common Mistakes to Avoid
While epoxy river tables are visually stunning, they require careful execution. Common mistakes include improper mixing ratios, inadequate sealing, and rushing the curing process. These errors can lead to cloudy resin, cracks, or structural issues.
Another frequent issue is poor slab preparation. If the wood is not properly dried or flattened, it can shift over time, compromising the integrity of the table. By taking the time to prepare each step thoroughly, builders can avoid these pitfalls and achieve professional results.
Why Epoxy River Tables Are Worth the Effort
Building an epoxy river table is not a simple project, but the rewards are substantial. The finished piece is more than just furniture—it is a statement of craftsmanship and creativity. Each table tells a story, combining the natural history of the wood with the modern innovation of resin. For those willing to invest the time and effort, the result is a showpiece that stands out in any space. Whether crafted for personal use or as a high-end product, epoxy river tables represent the perfect fusion of art and function.
The Future of Resin Furniture
As techniques and materials continue to evolve, the possibilities for epoxy river tables are expanding. New pigments, faster-curing resins, and advanced tools are making the process more accessible while also pushing the limits of design.
What began as a niche woodworking trend has grown into a global movement, with artisans and designers constantly innovating. The future of resin furniture promises even more creativity, making now the perfect time to explore the craft and build your own showpiece from scratch.